
When it comes to sharing files between a smartphone and a computer, there are several solutions available for a Windows and Android pairing. But for those of us with Apple devices, the selection of apps in this category isn't quite as great. You can use AirDrop to quickly share files, but searching for files is not so easy.
Luckily, though, an awesome app called Find It from developer Appersian is all you need to easily search, view, and download files from your Mac directly to your iPad, iPhone, or iPod touch. While the app has previously been available for $3.99, you can grab it for $0.99 right now—so if you own an iOS device and a MacBook or iMac, I'll show you how to set it up below.
Step 1: Install Find It on Your iPhone
To get started, simply install "Find It : Search your Mac on iPhone" on your iPad, iPhone, or iPod touch, then open the app and grant the permissions it requests on its first run.
Step 2: Install the Find It Server on Your Mac
Next, switch over to your Mac, then download the Find It server app from Appersian.
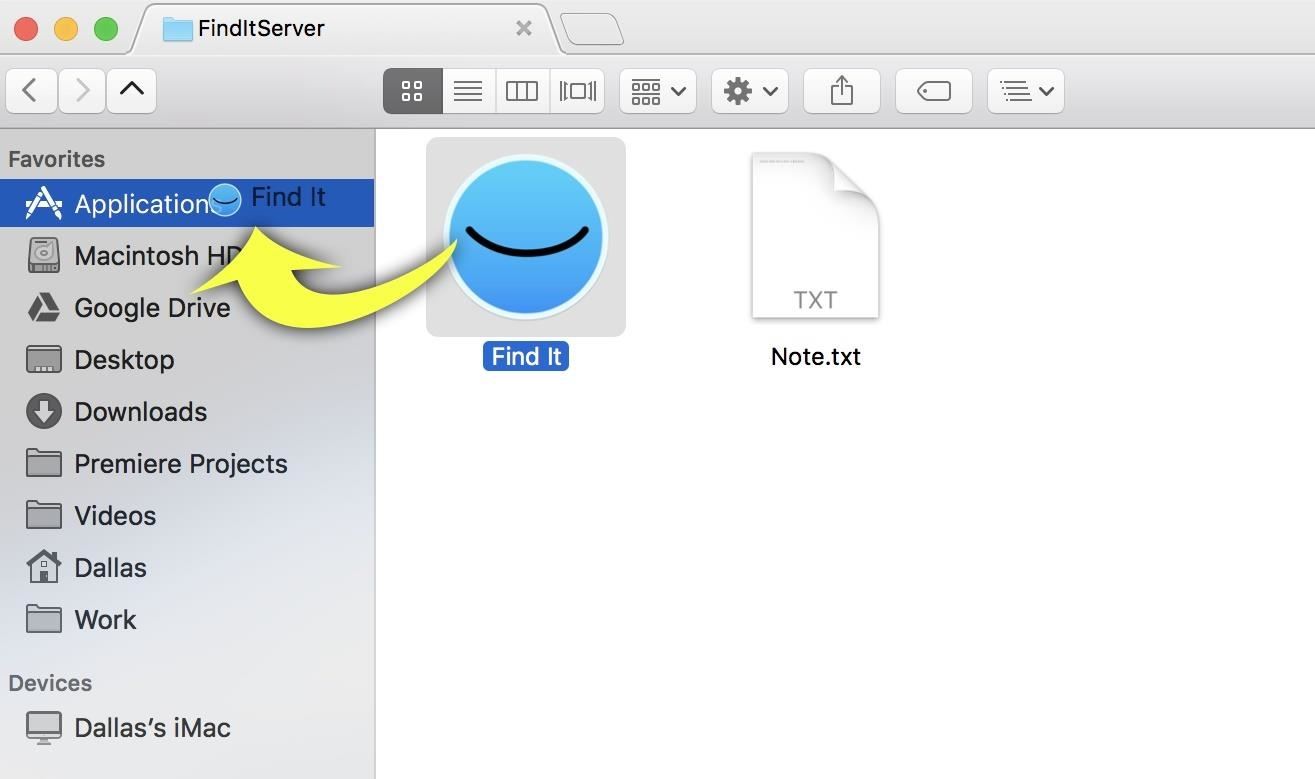
Once you've done that, double-click on the ZIP file you just downloaded to extract it. From there, you'll find a folder labeled "FindItServer"—open this folder, then drag the "Find It" app icon from this window over to your Applications folder so you always know where it's at.
Step 3: Configure the Find It Server on Your Mac
Next, go ahead and open the Find It Server app that you just installed on your Mac. From here, jot down the IP address that will be listed near the top of the window. Beyond that, you should also enable the "Open at Login" option to make sure Find It Server is always running.
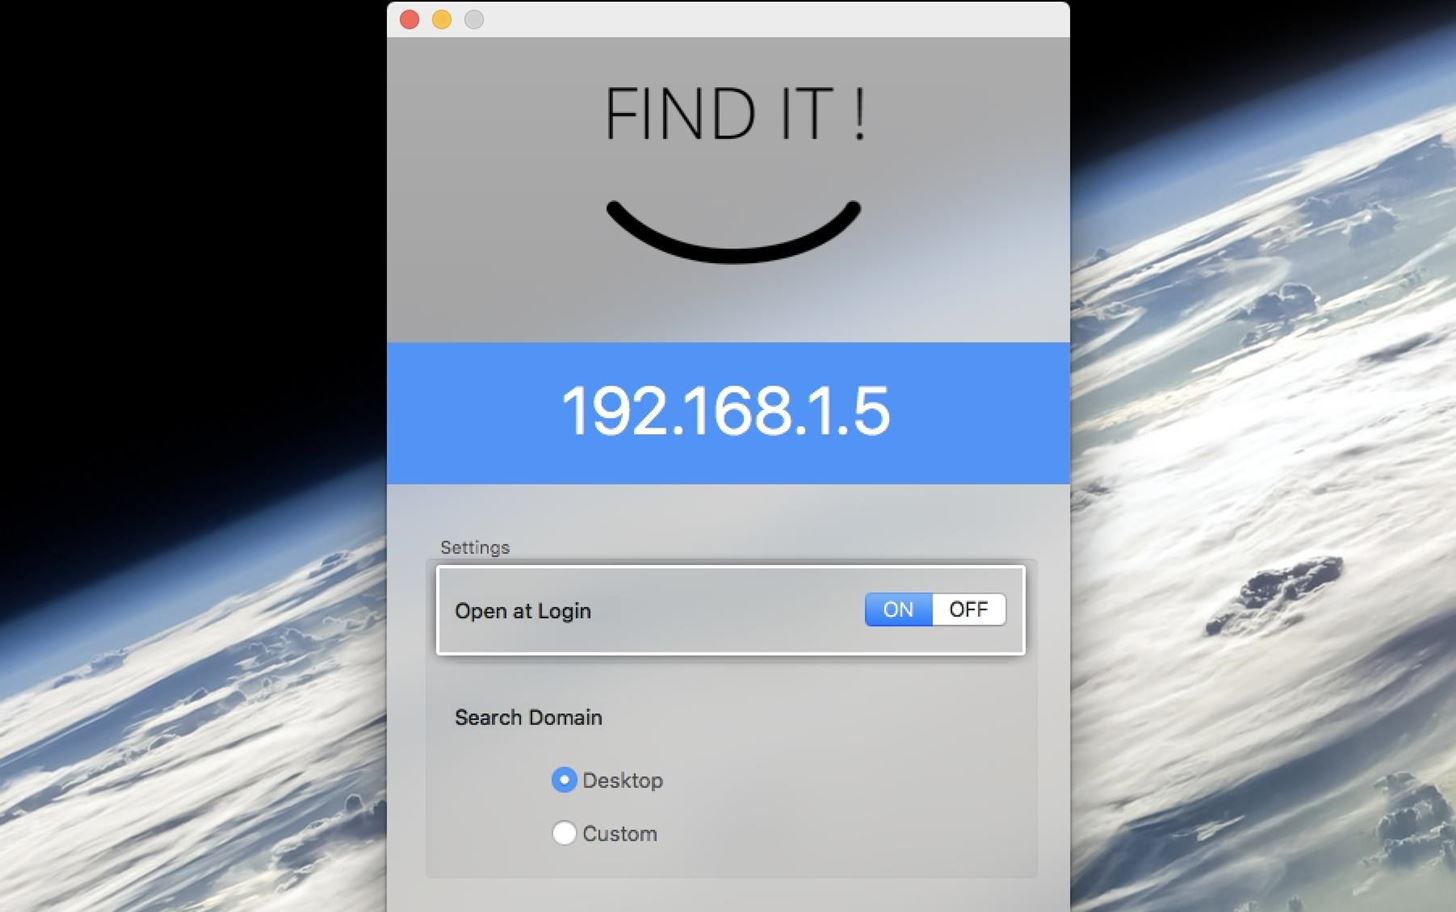
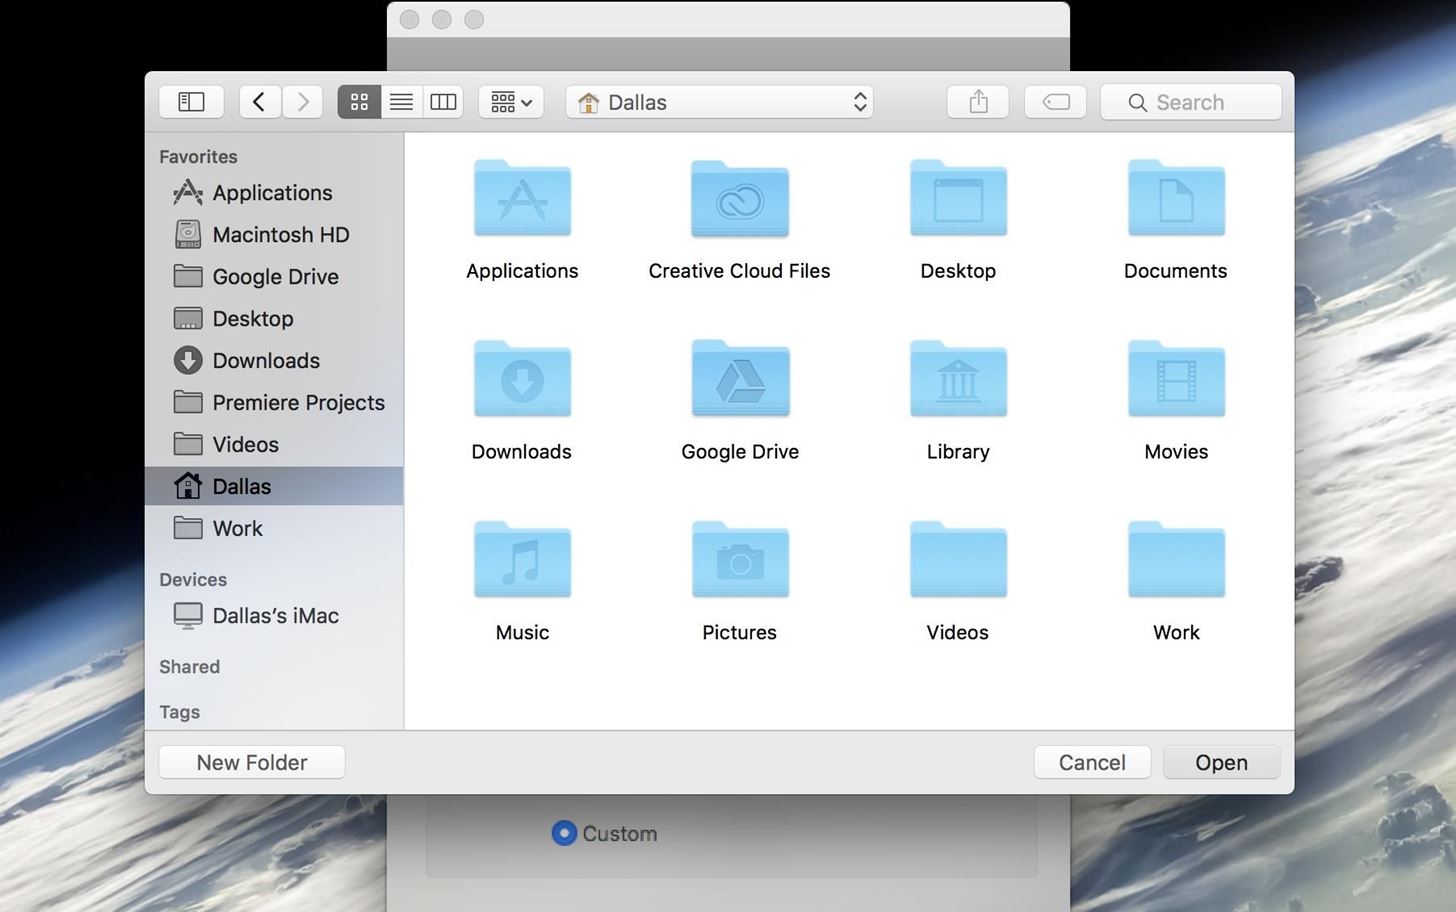
By default, the Find It Server is configured to only allow searching of files on your desktop. If you'd like to be able to search more folders, change the option under the Search Domain field from "Desktop" to "Custom." From here, you can select any folder on your system, then click "Open," and from now on, all files in that folder will be searchable from your iOS device.
Step 4: Configure the Find It App on Your iOS Device
At this point, you're done with setup on the Mac side of things. So back on your iPad, iPhone, or iPod touch, open the main Find It app, then tap the settings icon in the top-right corner. From here, type your Mac's IP address into the field at the top of the screen, then head back to the app's main menu.


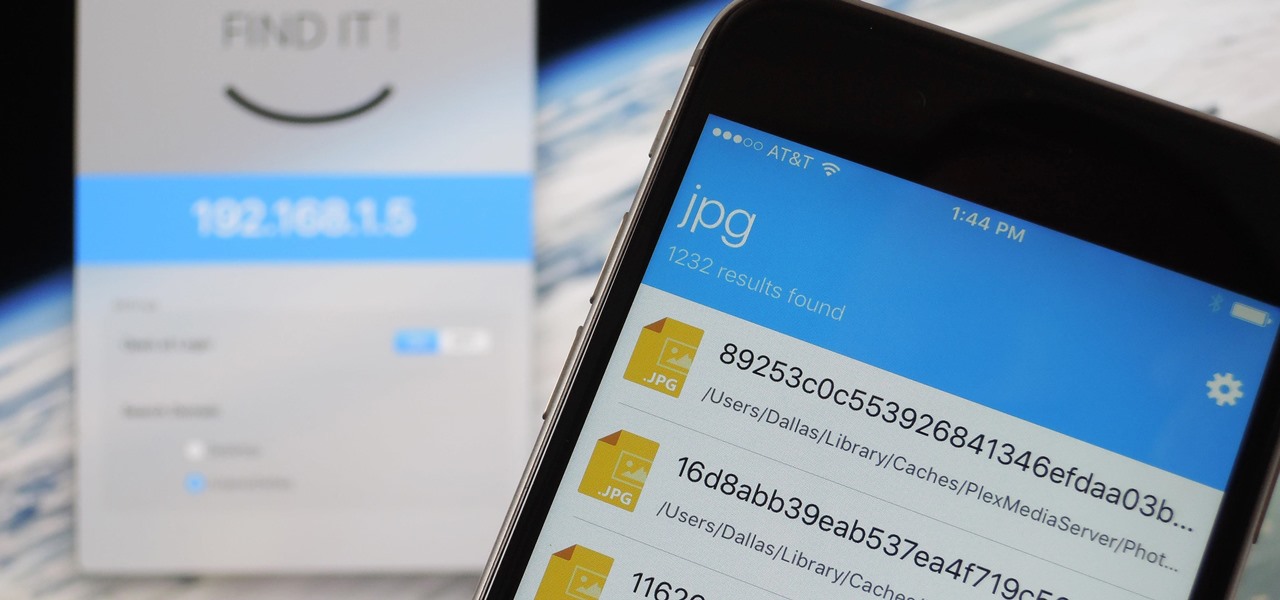
Step 5: Search & Browse Mac Files from Your iOS Device
From now on, whenever your iPhone (or other iOS device) is on the same Wi-Fi network as your Mac, you'll be able to find, view, and download any file from your computer. To try it out, just open the Find It app, then type a file name or extension into the field at the top of the screen. Within seconds, you'll see a list of all the files on your Mac which contain that keyword in their file names, and all you have to do to view a file is tap it in the list.


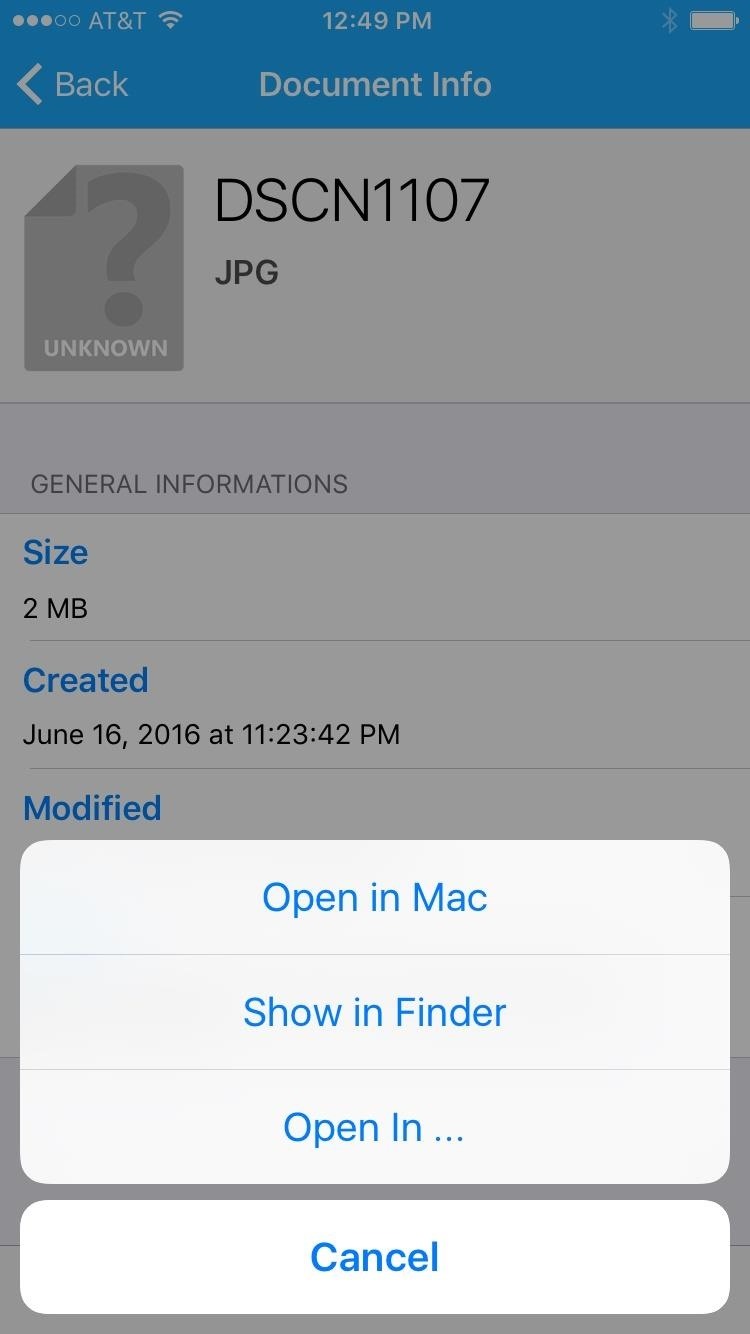
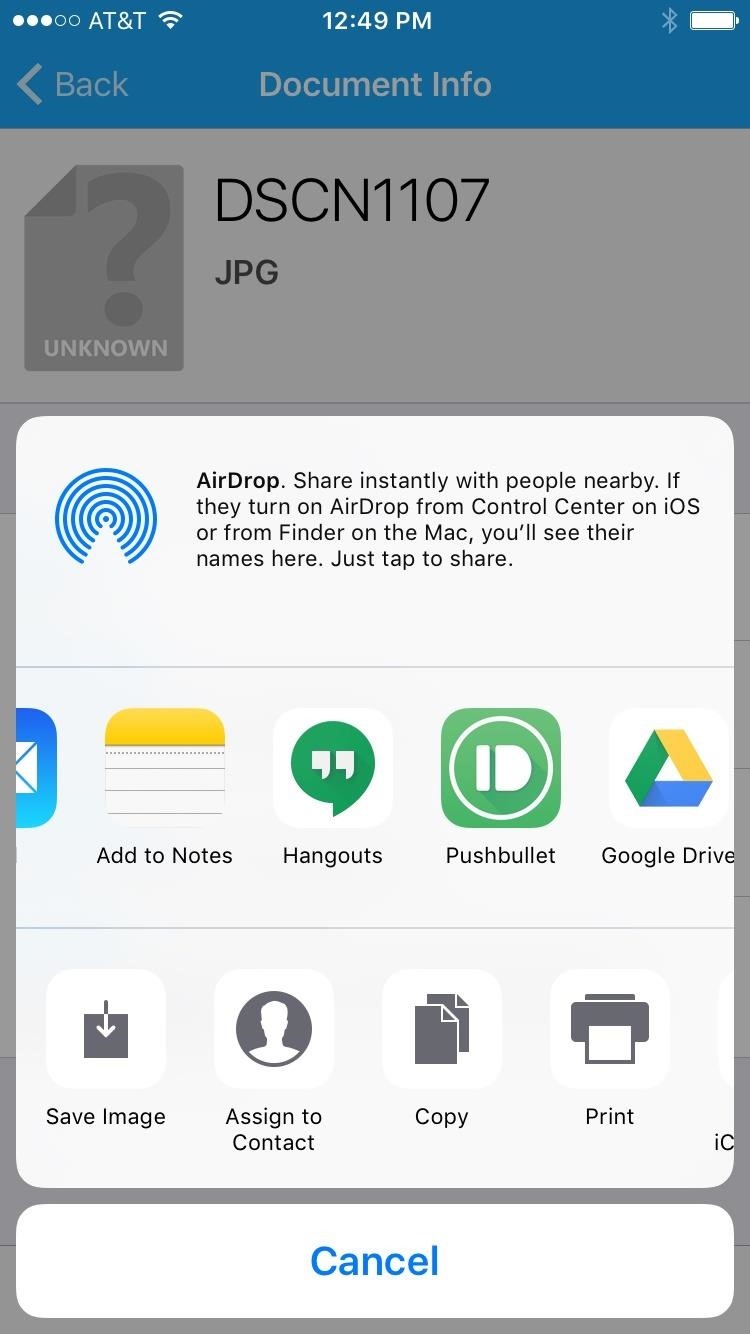
Once you've selected a file, you can tap the "Preview" button to view it on your iPhone. Otherwise, you can tap the "Options" button, then choose "Open In..." to either share the file with a compatible service, or simply save it. File transfer speeds are lightning-quick, so your Mac and iOS device are now interconnected like never before.
Just updated your iPhone? You'll find new emoji, enhanced security, podcast transcripts, Apple Cash virtual numbers, and other useful features. There are even new additions hidden within Safari. Find out what's new and changed on your iPhone with the iOS 17.4 update.


Be the First to Comment
Share Your Thoughts