

If you couldn't wait to test drive iOS 9 before its official release this fall, you probably have the beta software on your iPhone right now. However, if you're not a fan of all the bugs and glitches that accompanies it, it's not too late—you can still downgrade back to the latest version of iOS 8.
The process for reverting back to the latest version of iOS 8 (currently 8.4.1) is actually really easy, and will have your device running smooth again until the official, stable release of iOS 9 is ready. Just follow the steps below to downgrade.
- Don't Miss: The Coolest iOS 9 Features for Your iPad or iPhone
- Don't Miss: How to Sign Up for the iOS 9 Public Beta Preview
Note that once iOS 9 is officially released this fall, you will not be able to downgrade using this method. If you still feel like going back to iOS 8 once the official one is out, check in with Gadget Hacks for a new guide.
Step 1: Back Up Your Device
If you recently updated from iOS 8.3 to iOS 9, then you probably have a backup on hand. If you don't, take a look at our guide on freeing up space for more details on backing up your iOS device before continuing below.
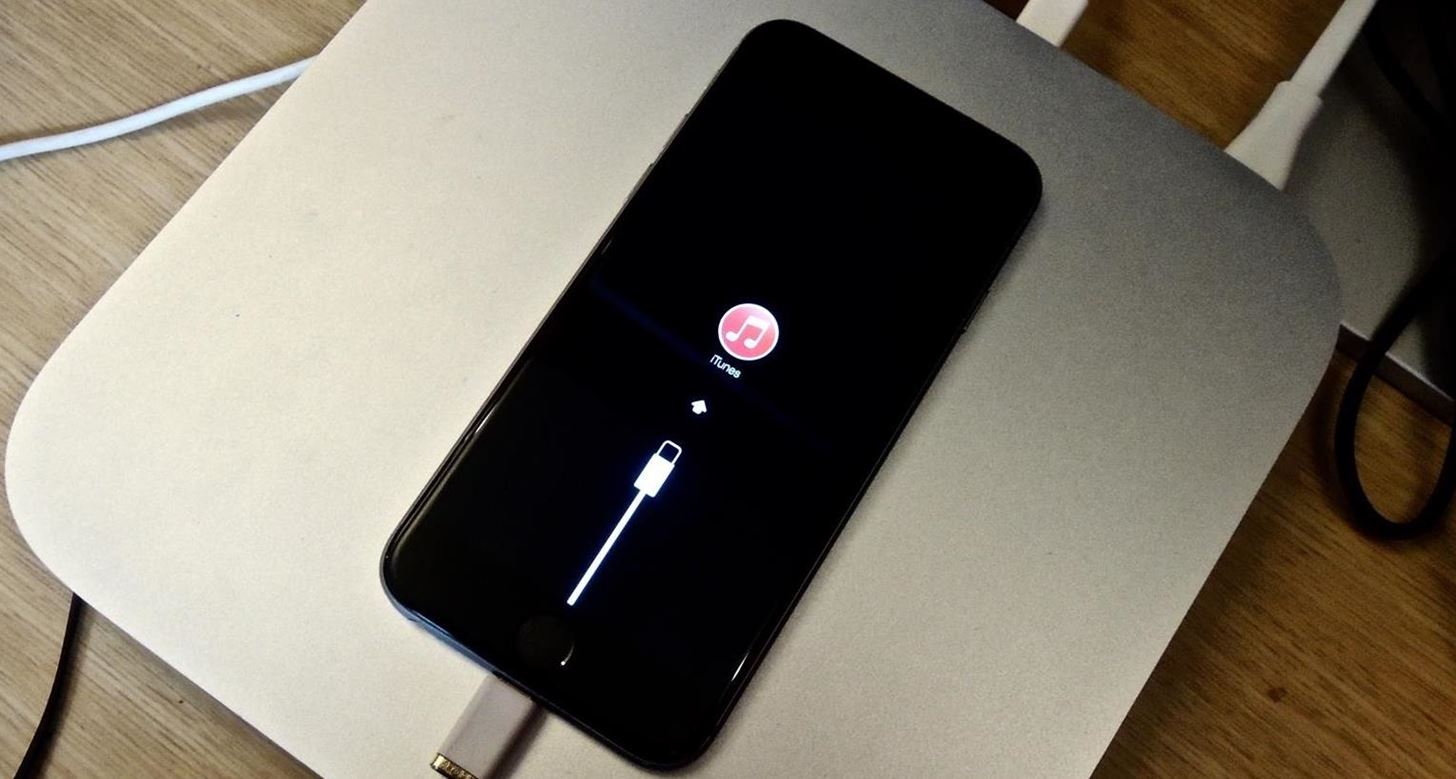
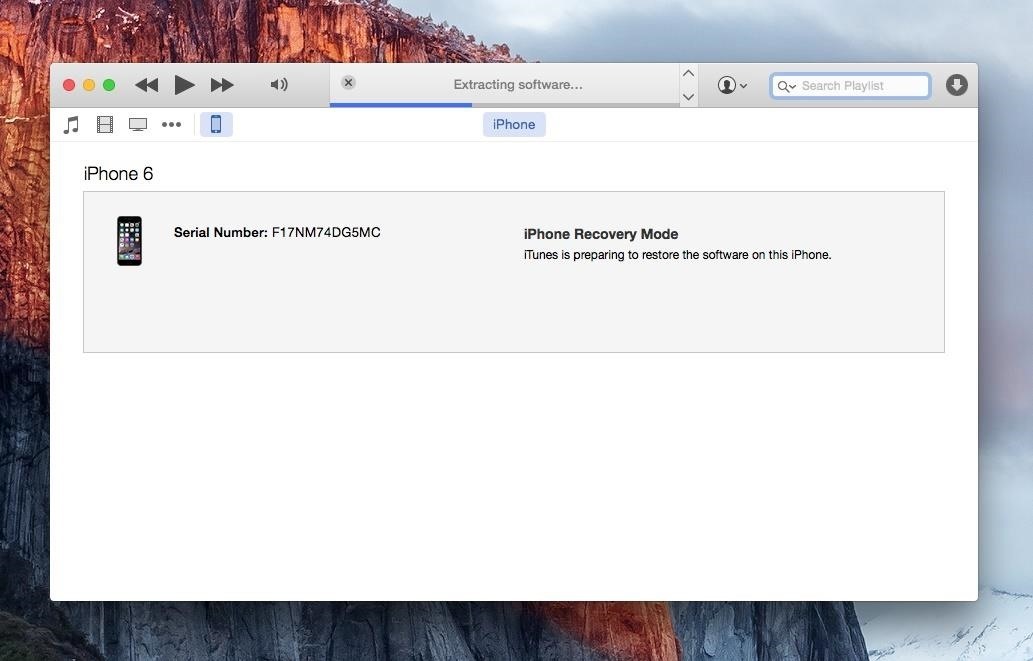
Step 2: Enter Recovery Mode
In order to revert back to iOS 8.4.1, you'll need to place your device in recovery mode before connecting it to iTunes.
Turn off your device like you typically would, then wait for it to completely shut down. Plug the USB-end of the Lightning cable into your computer, but don't plug the other end into your iPhone just yet.
Hold down the Home button while you connect the cord to your iPhone, and keep holding it down until you see the recovery mode image.
Step 3: Cancel the Pop-Up Window
iTunes should immediately recognize your device and present you with options to "Restore" or "Update"—in this case, we're clicking "Cancel."
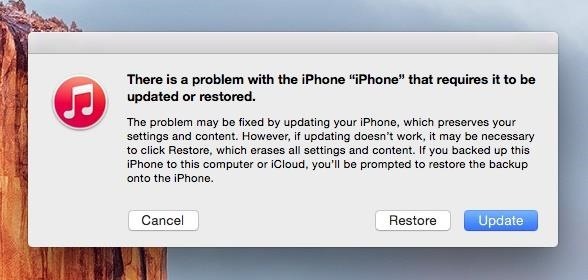
The reason for selecting "Cancel" is because using this popup did not work for me and resulted in iTunes giving me an error message. Your mileage may vary, so feel free to try clicking on "Restore," or move to the next step.
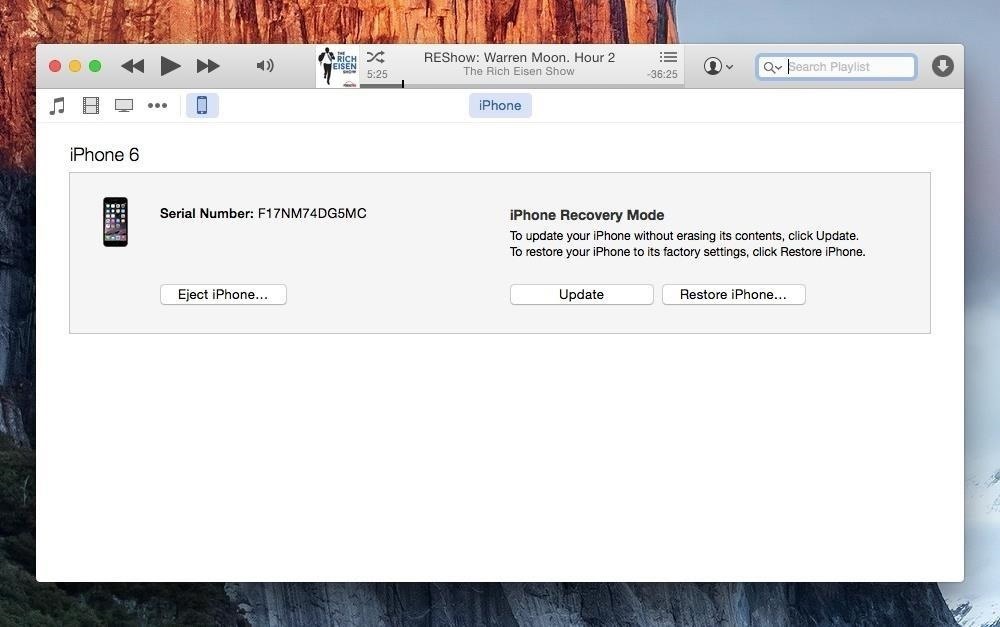
Step 4: Restore Your iPhone
With your iPhone selected in iTunes, click "Restore iPhone."
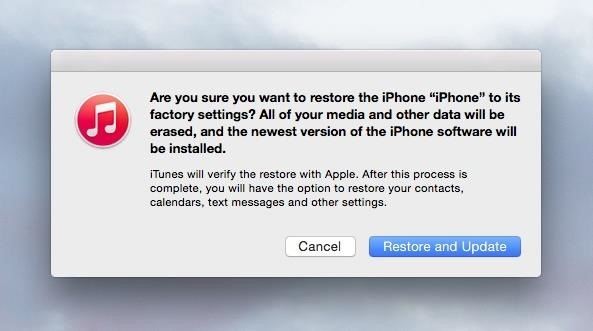
Another window will pop up where you'll verify and confirm by clicking "Restore and Update." After agreeing to the terms, all you need to do is sit and wait a few short minutes.
Step 5: Restore from Backup or Start Fresh
Depending on your setup, you will now be able to restore your iPhone from a backup, or set it up as a new device, which is great for freeing up space.

That's pretty much it. If you decided to set it up as a new device, you just have to go through the initial iOS setup process.

This downgrading process should also work for an iPad or iPod touch.
Follow Apple Hacks over on Facebook and Twitter, or Gadget Hacks over on Facebook, Google+, and Twitter, for more Apple fun.
Just updated your iPhone? You'll find new emoji, enhanced security, podcast transcripts, Apple Cash virtual numbers, and other useful features. There are even new additions hidden within Safari. Find out what's new and changed on your iPhone with the iOS 17.4 update.


Be the First to Comment
Share Your Thoughts