
The newest version of Apple's mobile operating system, iOS 10, has been out for about a month now. But like every year beforehand, some of you who updated will not be happy with the latest and "greatest" iOS version.
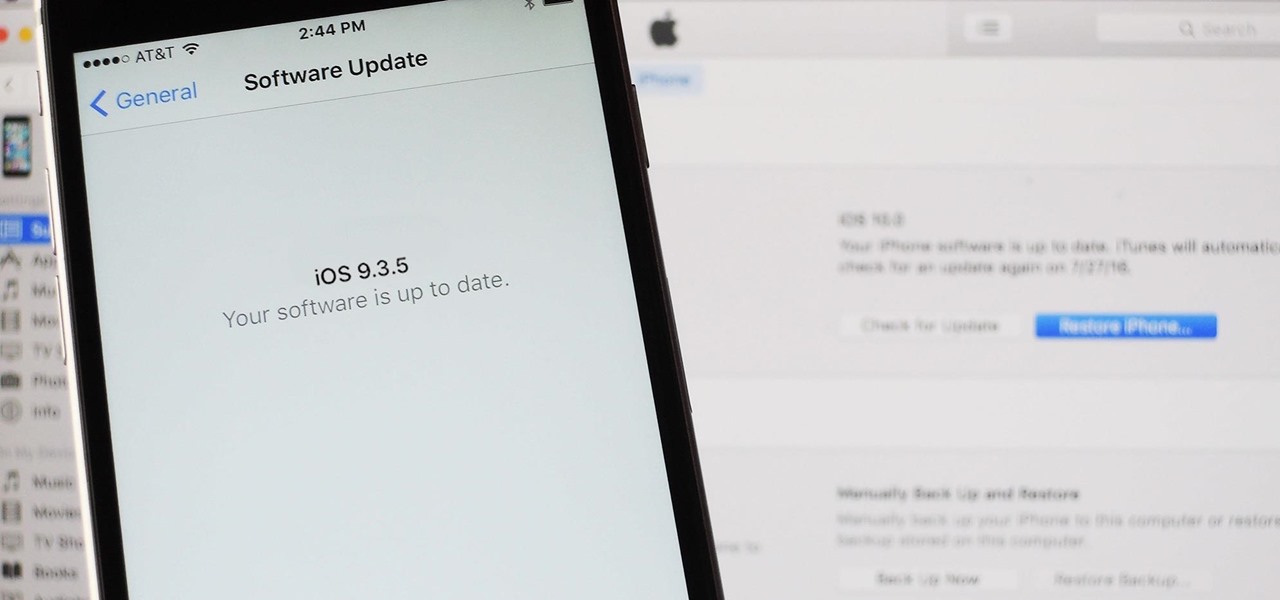
If that happens to be the case for you, you've still got a window to downgrade back to iOS 9.3.5, the last version of iOS 9—but that window isn't quite known yet. It could be days or even weeks before they stop signing iOS 9.3.5, so if you want to downgrade, you've got to do it quickly.
Fortunately, it's fairly easy to roll back to an older firmware version as long as you have a Mac or a Windows PC. The downgrade process from iOS 10.0.1 to iOS 9.3.5 only takes a few minutes of work, so I'll show you how to do it below.
Method 1: The Easy Way, AKA 'Updating' to iOS 9
There are two different methods that you can use to revert your firmware back to iOS 9.3.5. This first one is preferred, as it preserves all of your existing data and apps, so there's minimal downtime. Plus, it's the easiest.
However, there is a slight risk that you'll experience a few bugs after downgrading with this method, so then you'll want to either perform a full factory reset or try the second method at the bottom of this article, which will erase your data, but fix any minor quirks. If you don't care about saving any data, Method 2 is definitely the way to go to get up and running without any further issues.
Step 1: Download the IPSW File for Your Device
First up, you'll need to download the IPSW file of iOS 9.3.5 for your particular model of iPad, iPhone, or iPod touch. While you normally need a developer account to access IPSW files, there freely available online from reputable sources such as IPSW.me and OS X Daily. So head to one of those sources on your Mac or PC, then select your device model to download iOS 9.3.5 for it.

Apple basically blacklists older firmware versions, so only the past version or two can be installed. In this case, it's only iOS 9.3.5.
Click the download link for the file you want and wait for it to download. The file is rather large, so it could take up to 30 minutes to download, depending on your internet connection.

Step 2: Install the Older Firmware with iTunes
Once the IPSW file has been downloaded, go ahead and connect your iPad, iPhone, or iPod touch to your computer using a good quality Lightning cable that doesn't have any visible damage. From here, open iTunes, then click the phone icon near the top of the screen to head to the device menu.

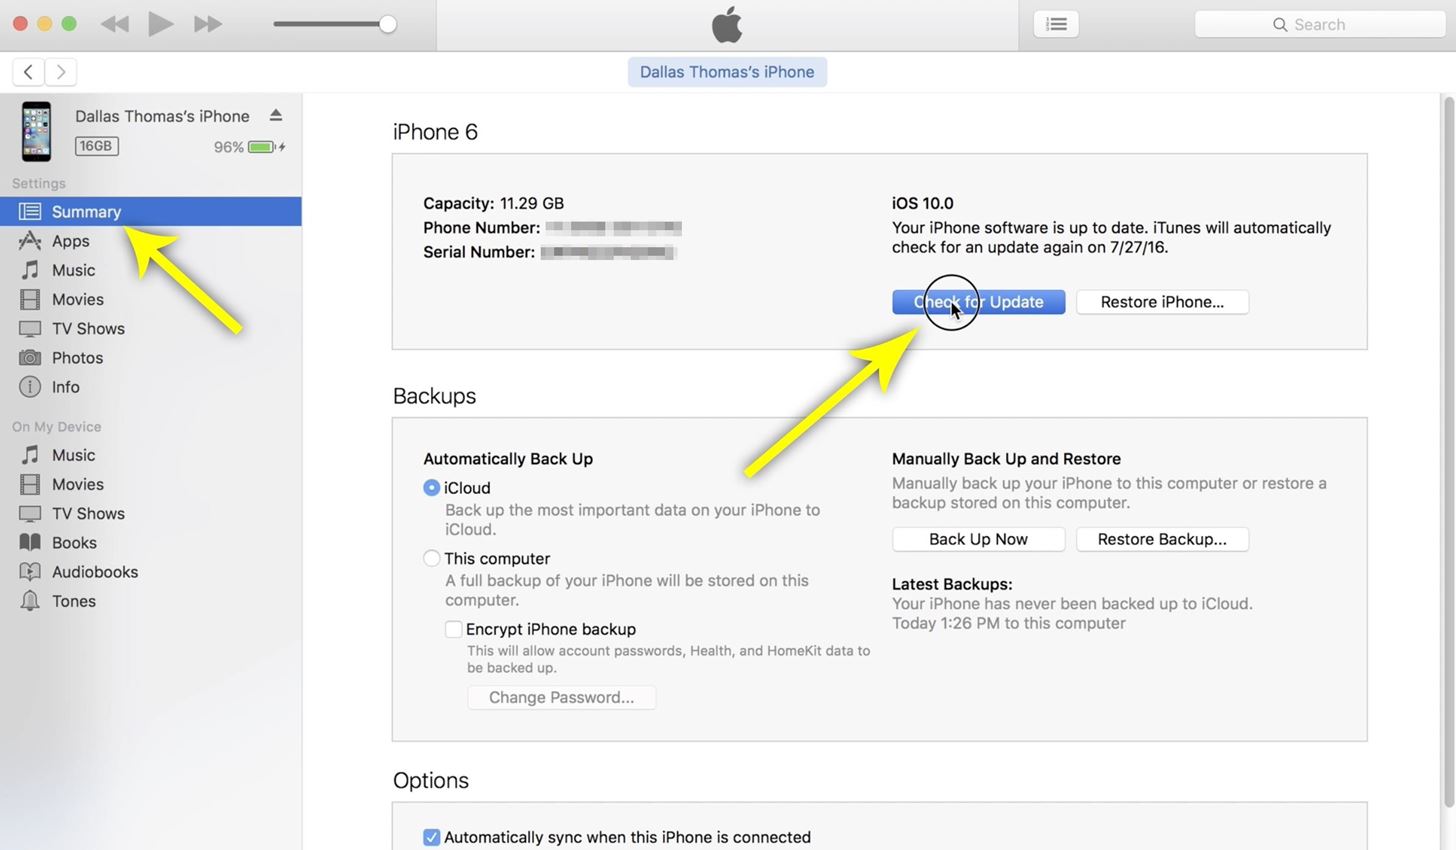
Next up, select the Summary tab on the left, if you're not already there.
From here, hold down the Option key (on Macs) or Shift key (on Windows) and click on the "Check for Update" button below where it says you have iOS 10 up to date.
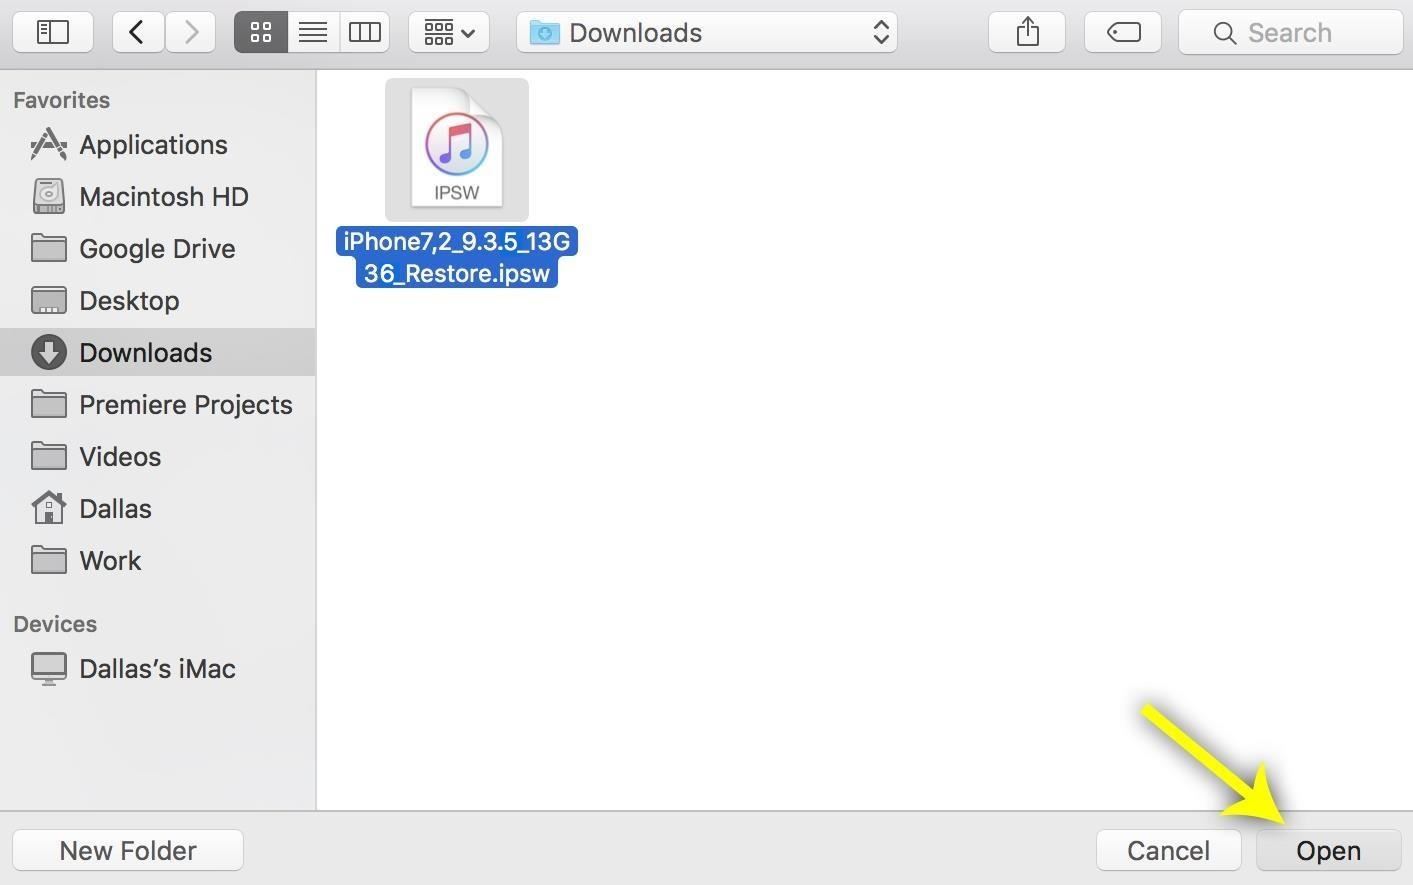
You'll now see a file browser menu—use this to navigate to your download folder, then select the IPSW file that you downloaded in Step 2 and click "Open."
Finally, verify your choice by clicking the "Update" button, then iTunes will get to work downgrading your device's firmware. The rest of the process will happen automatically, so sit back and wait (it will take up to 30 minutes), then your device will automatically reboot, and the old firmware version will be installed.

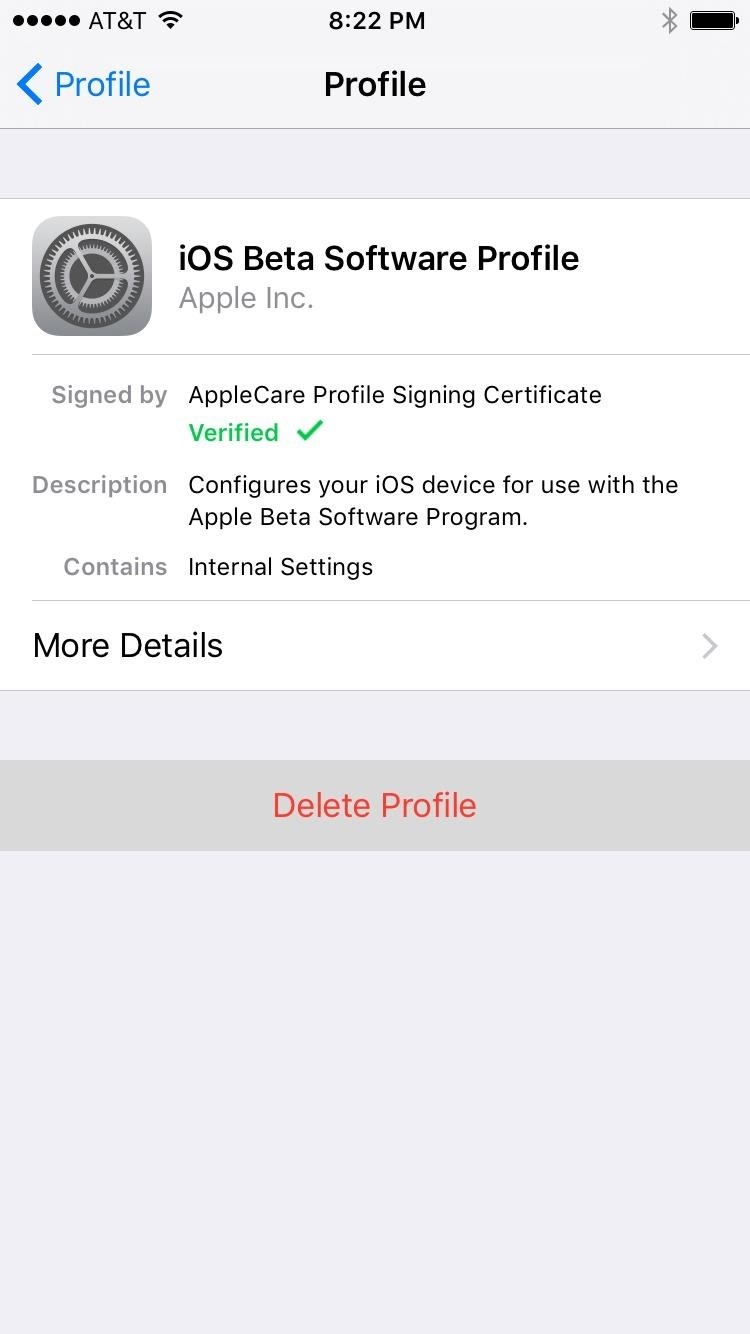
Step 3: Uninstall Your Beta Profile (For Public Beta Uses Only)
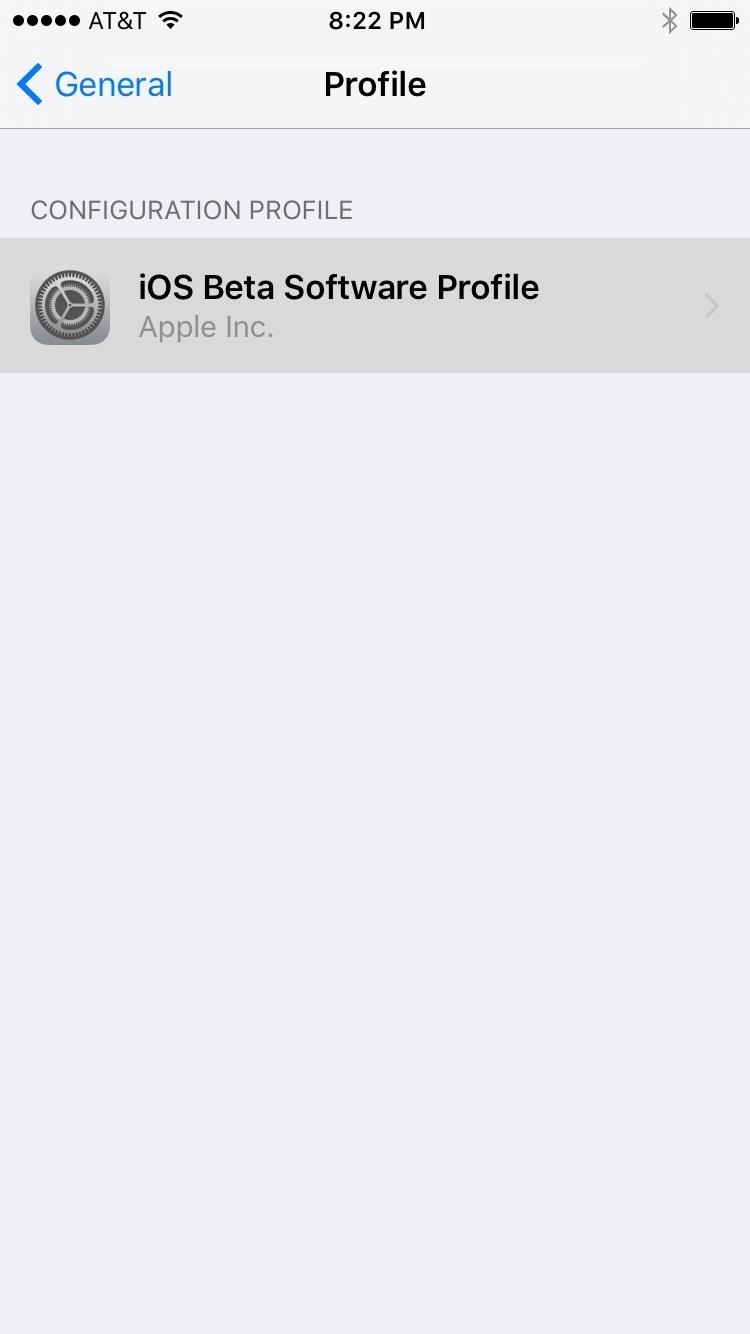
Once you get back up, you'll simply need to accept the terms of service again, then you'll be all set and ready to go. However, if you are apart of the public beta program and have a beta profile installed, you'll want to remove that now, since you no longer need it.
So head to the General menu in Settings, then select "Profile," and tap your beta profile in the list. From here, enter your PIN, then select "Delete Profile," and confirm your choice on the subsequent popup.

With everything finished, you'll now be running the older version of iOS, so all of the new complications from iOS 10 will be a thing of the past.
Method 2: Use Only if You Experience Bugs ('Restoring' to iOS 9)
If you've experienced any bugs after downgrading with Method 1, it's likely because of corrupt, leftover data from the newer version of iOS. The only way to solve these issues is to do a full restore and get rid of the corrupt data. You can try just performing a factory reset on your device, but the following is a surefire way to make sure your iOS device will run smoothly.
Step 1: Find Your iOS 9 Backup
So first up, be aware that downgrading your firmware with this method will delete your existing apps and their data, which means you'll need to have the important stuff backed up. However, iOS 10 backups cannot be restored on iOS 9.3.5, so this presents a problem.
You'll only be able to restore all of your data if you have an old iOS 9.3.5 (or older) backup that was made prior to downgrading with Method 1. You could try backing up after trying Method 1, but some of the issues could still persist.
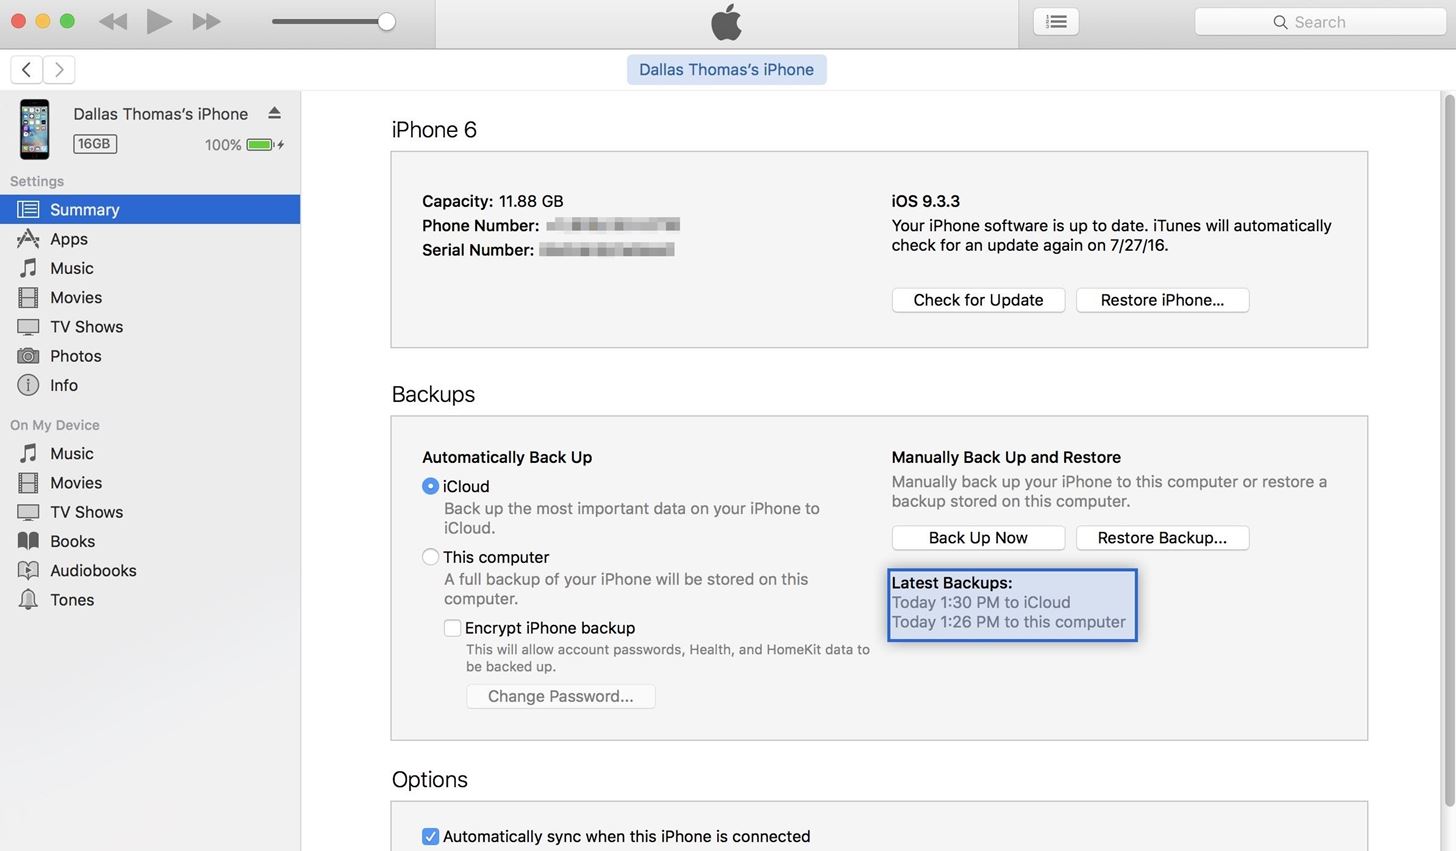
iCloud should have automatically created a backup when you were last running 9.3.5 before updating to iOS 10, so most folks will be fine. But, if you'd like to verify, connect your iPad, iPhone, or iPod touch to your computer, then check the Device section in iTunes to view your backups. The information listed here doesn't contain iOS version numbers, so you'll have to check the dates of the backups, then cross reference with your own memory of when you were last running iOS 9.3.5 (or an older version) to know whether or not the backup will be compatible.
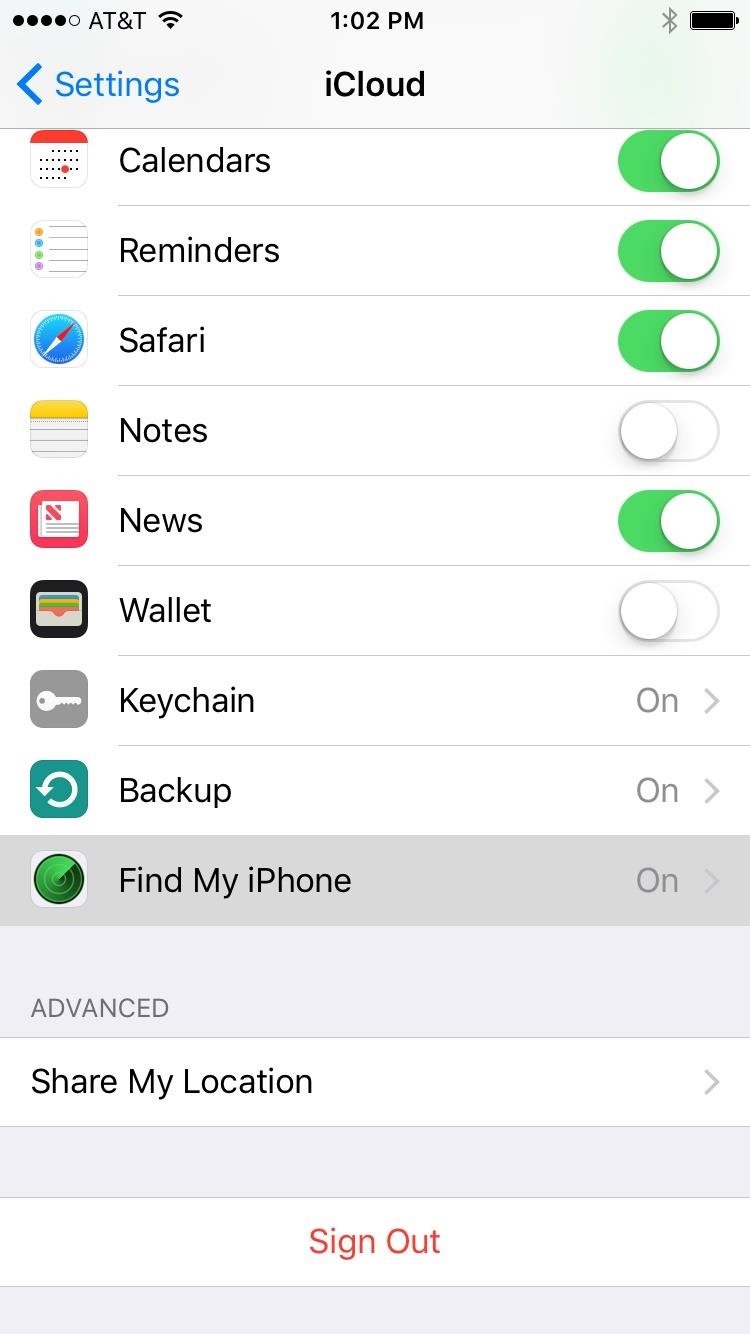
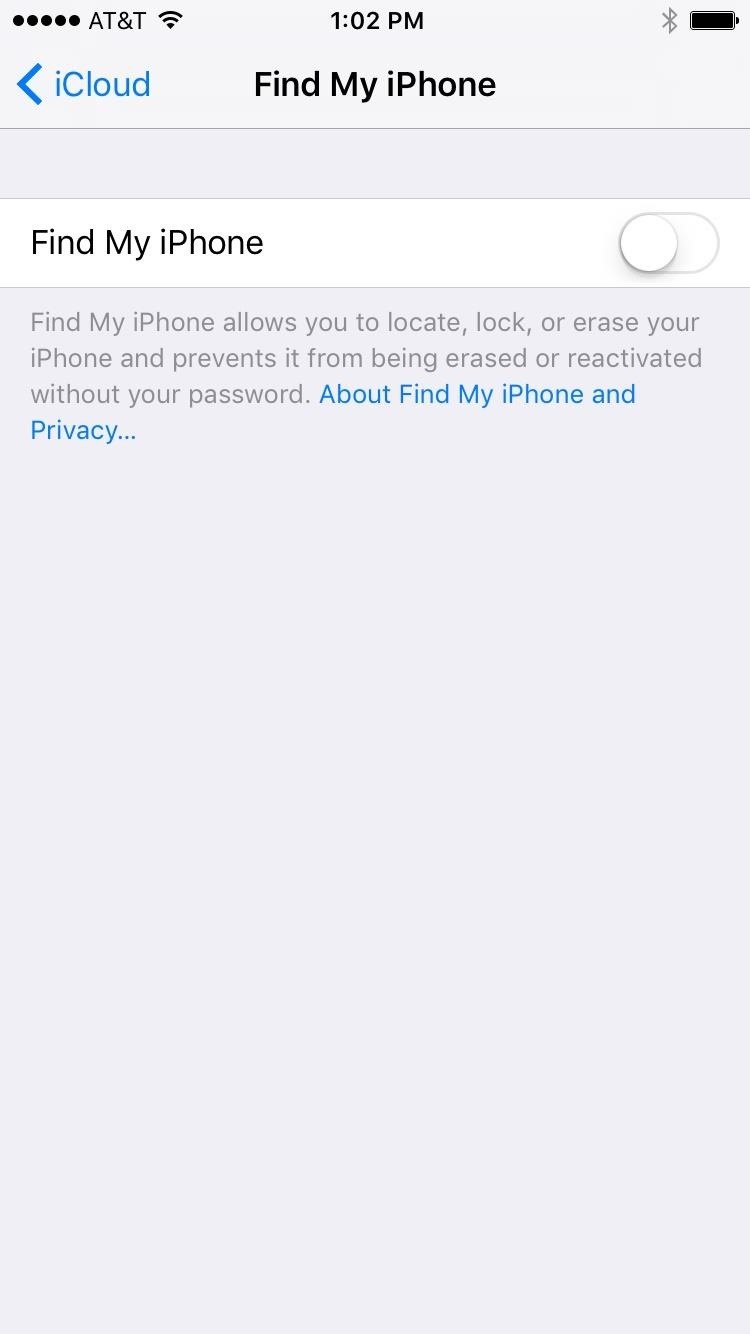
Step 2: Disable Find My iPhone
Aside from that, having "Find My iPhone" enabled will interfere with the restore process, so you'll have to disable that before you begin. So head to the main Settings menu on your device, then open the "iCloud" submenu. From here, scroll down a bit, then select "Find My iPhone." Finally, disable Find My iPhone, then you'll be all set to downgrade your firmware.
Step 3: Start the Downgrade Process
Assuming you've already downloaded the IPSW file for your device, the rest of the process will be rather easy. It's mostly the same as Method 1, but with one minor exception, so you can use the above screenshots for visual reference. To start, connect your iOS device to your computer, then follow these steps:
- Open up iTunes.
- Head to the "Device" menu.
- Select the "Summary" tab.
- Hold the Option key (Mac) or left Shift key (Windows).
- Click on "Restore iPhone" (or "iPad" or "iPod").
- Open the IPSW file.
- Confirm by clicking the "Restore" button.
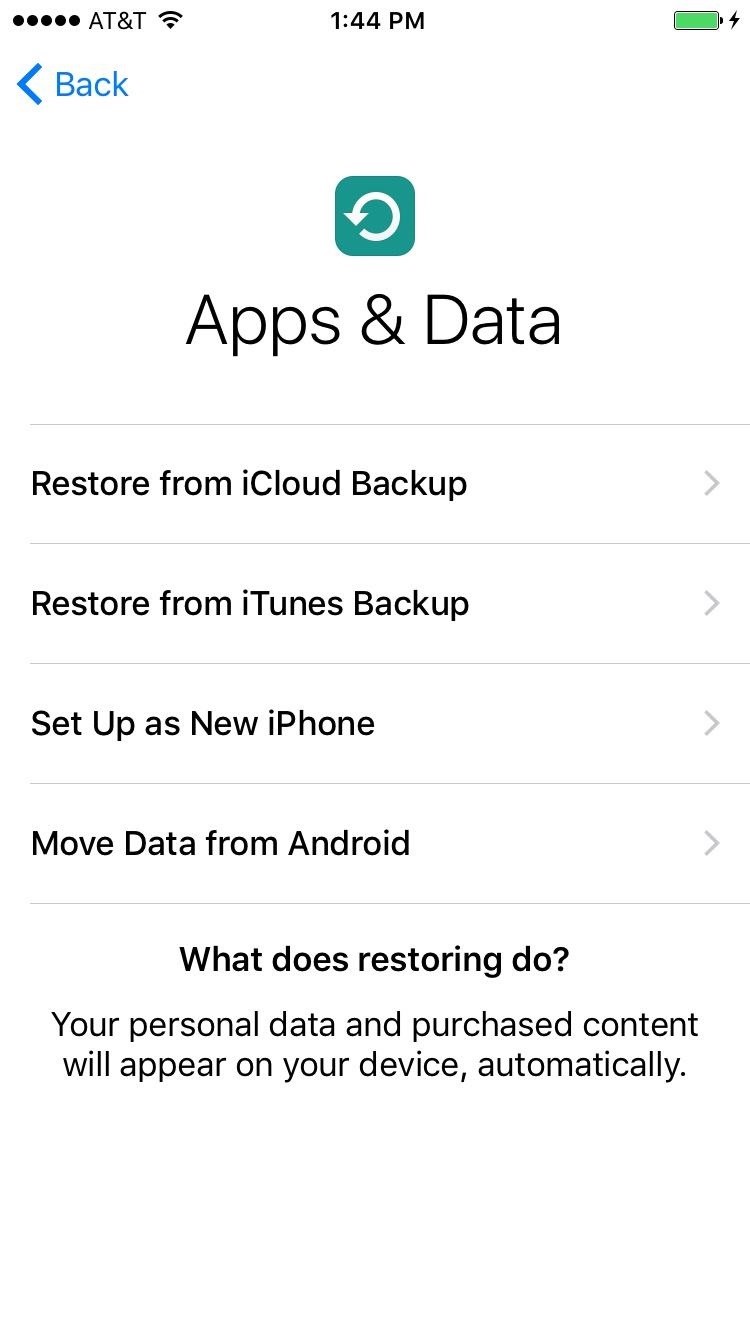
Just like with Method 1, iTunes will take care of the rest, and your device will reboot after it's done. Once the process has finished, run through initial setup, then select "Set Up as New" if you want a completely new start, or "Restore from iCloud Backup" if you want to get all your apps and data back. If going with the latter, just sign in with your Apple ID, then select the most recent iOS 9.3.x backup, and your apps and data will be restored.

If you choose this method over the easy one to begin with, make sure to see the step above about removing your beta profile if you no longer want it.
Have any issues with either of these two methods? Let us know below, and we'll try to steer you in the right direction.
Just updated your iPhone? You'll find new emoji, enhanced security, podcast transcripts, Apple Cash virtual numbers, and other useful features. There are even new additions hidden within Safari. Find out what's new and changed on your iPhone with the iOS 17.4 update.


Be the First to Comment
Share Your Thoughts