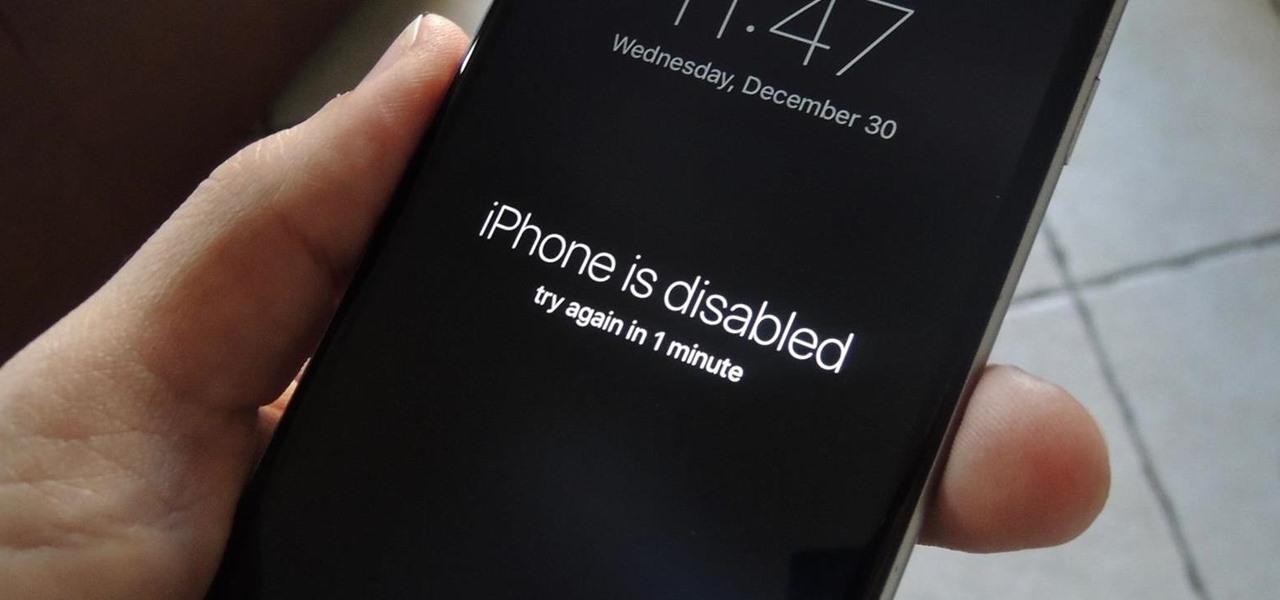

With Touch ID on iOS devices, it's a little more difficult to lock yourself out. However, it can still happen if you don't use it, have a busted fingerprint scanner, or use an older device that doesn't have Touch ID, which means you're passcode dependent (unless you have zero lock screen security).
Even if your Touch ID sensor works perfectly, your backup passcode is required after a device restart—either manually or because of an update—and whenever you enter your Touch ID settings.
If you do forget your passcode for some reason (or maybe it's your parent who forgot it... again) and you're locked out of your iPad, iPhone, or iPod touch, this guide will go over three methods that'll get you back into the device as well as some preventative measures you should take to keep from getting locked out again.
Before You Start
Although this guide will help you get back into your device, there is no way of recovering the data on it unless you've created an iCloud or iTunes backup before getting locked out. To get back into the iOS device, each method below will erase the device, including all content and data.
That being said, if you're not completely locked out yet, we suggest trying out some common PIN codes, like significant dates such as birthdays or anniversaries, before you go any further. And if you're running an older iOS version, check our guide on how thieves unlock passcodes to break into your own device, in case any of the exploits still work.
Which Method Should You Use?
As stated, all of these methods will get you back into your device, but some are more convenient than others. Below are the suggested basic requirements for each method.
- iTunes Method: Find My iPhone is not activated and you've previously synced the device with iTunes.
- iCloud Method: You're signed into iCloud and Find My iPhone is activated on the device.
- Recovery Mode Method: You've never synced with iTunes or you can't connect to iTunes, and you do not use iCloud.
Method 1: iTunes
Connect your iOS device to the computer you previously synced it with, then open iTunes and wait for the device to sync (if you have "Automatically sync when this iPhone is connected" checked) and back up automatically. If it asks for a passcode, try another computer that you've synced to, if any, or skip below to the Recovery Mode Method.
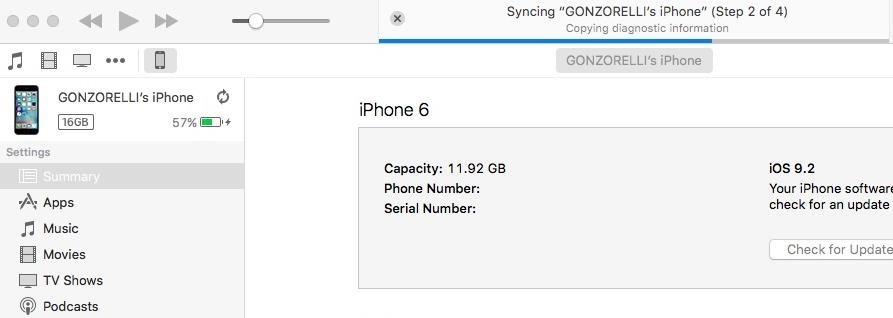
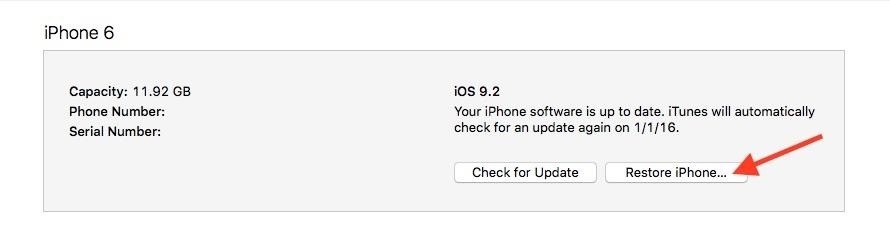
After that's done, click on "Restore iPhone," or whichever type of device you're using. Confirm the restoration process on the following popup to revert the device back to its factory settings. If you get a notice saying that you need to deactivate Find My iPhone first, then you'll need to try the iCloud Method below instead.
iTunes will then extract the software before restoring your device. Once the device is restored, you can set it up like new or restore from a backup.

If you're unsure how to restore the device using a backup, see the "Restoring the Device" section below.
Method 2: iCloud
This method is easily achievable from a computer or another iOS device since all you have to do is erase the device using iCloud. Although the written guide and video provided below refer to disabling Find My iPhone specifically, the process also details how to wipe the device via iCloud.
With your device now erased, skip down this guide to start restoring it back to normal, or just set it up like a new device if you didn't create a backup.
Method 3: Recovery Mode
For the desperate who have never synced with iTunes and don't have Find My iPhone activated, you will need to enter recovery mode.
With your device connected to a computer and iTunes opened, simultaneously hold down the Sleep/Wake and Home/Touch ID buttons until you see the recovery mode screen—not the Apple logo.
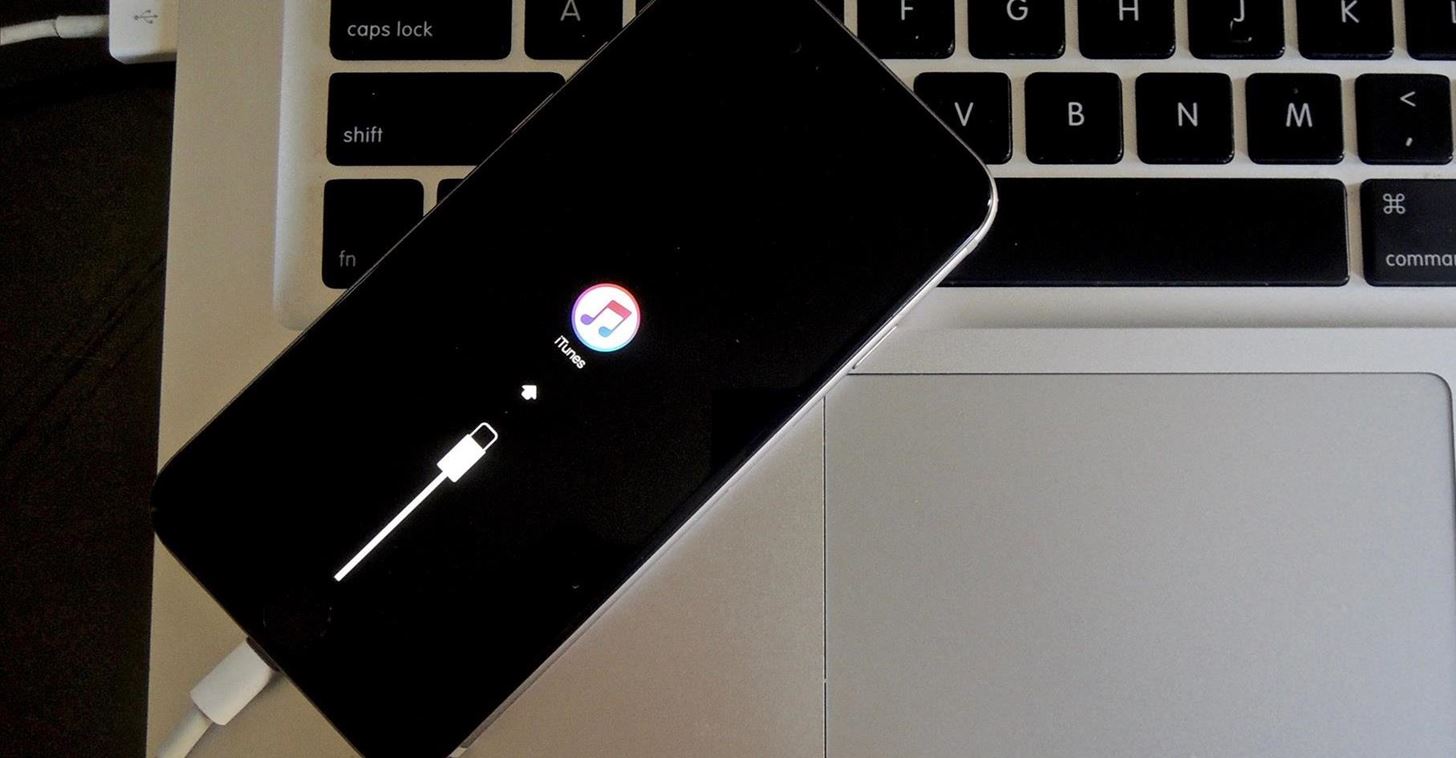
Once the device is in recovery mode, you can let go of the buttons. iTunes will then display a popup on your computer. Since the Update option preserves the settings and content, including your passcode, click on the Restore option to do a full reinstall of iOS.

iTunes will begin downloading the software, which may take around ten minutes. After the process is complete, you'll be able to set up the device like new, or restore from a backup.
Restoring the Device
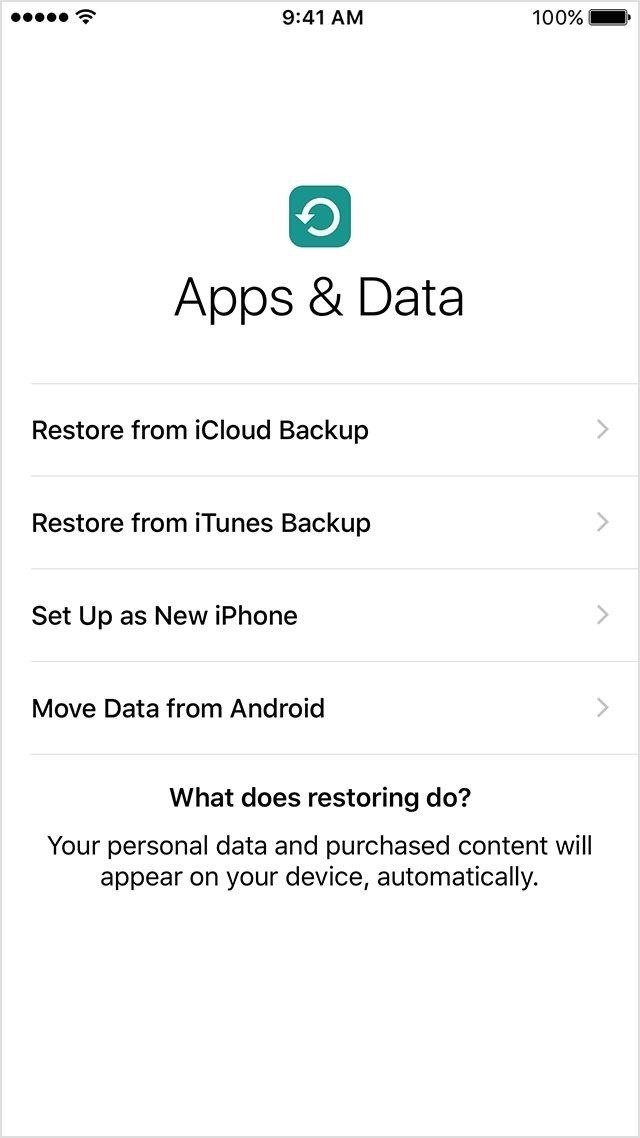
With your device wiped, you'll want to get all your content back by restoring from a backup you've previously created, if you've made one. On the Apps & Data setup page on your iPad, iPhone, or iPod touch, select your restore option, or just set it up as a new device.

Preventative Measures
To prevent yourself from getting locked out of your device again, there are a few precautions that you can take.
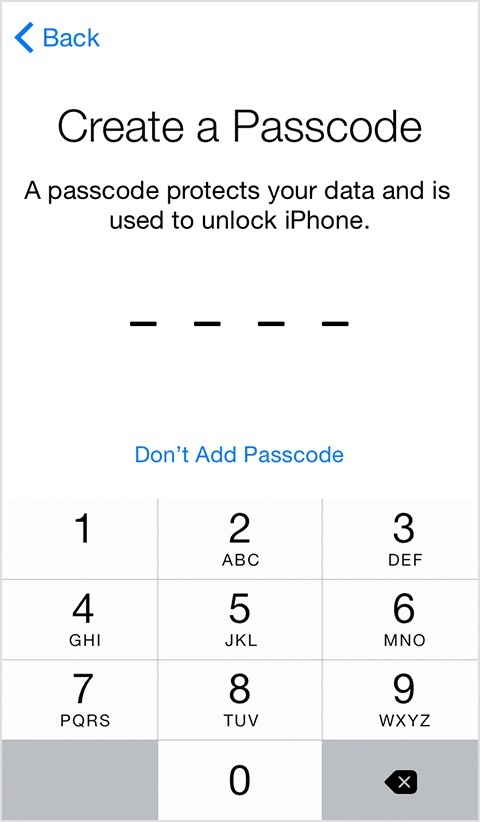
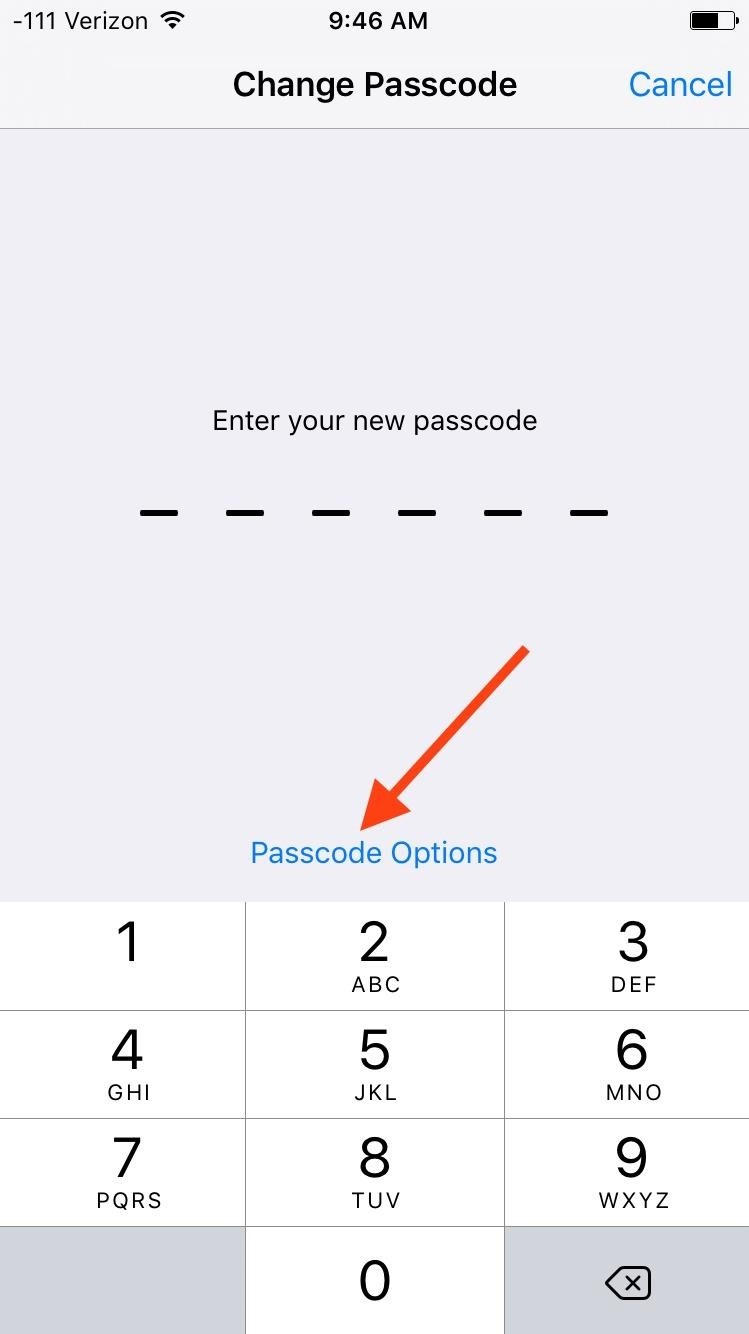
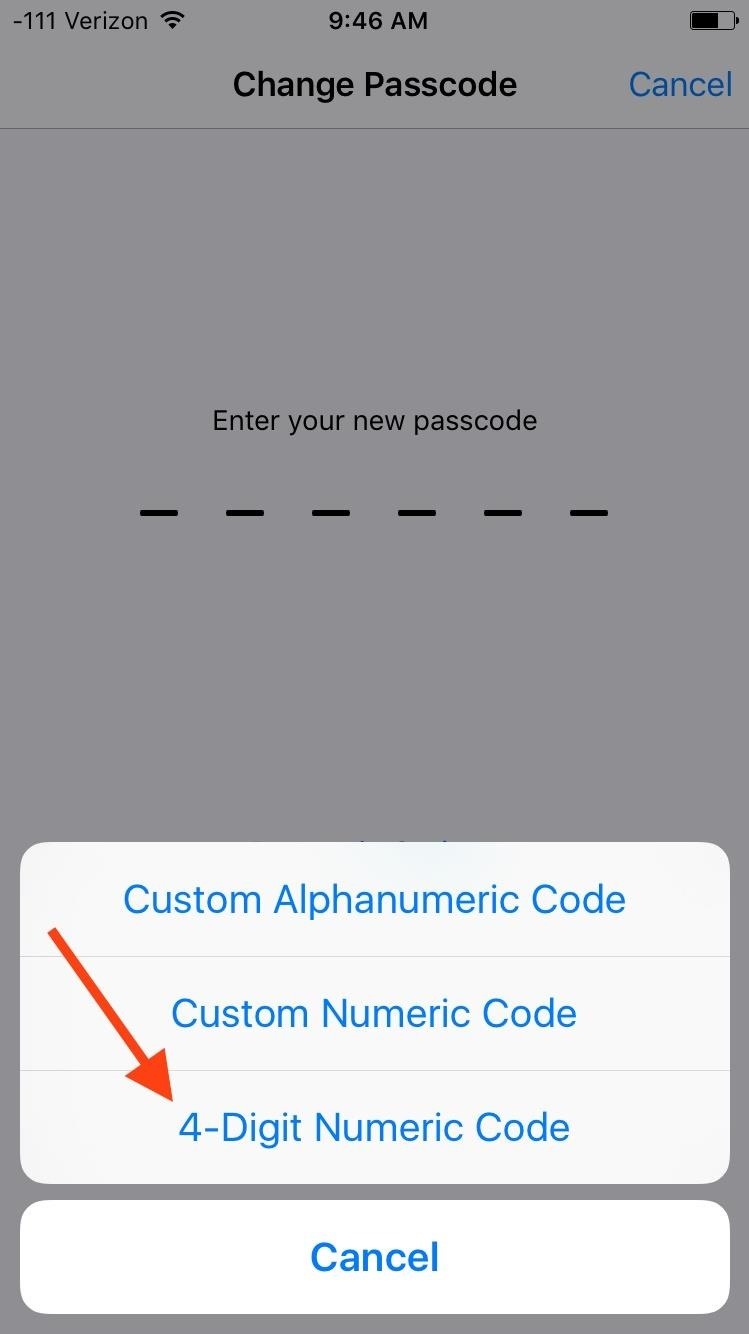
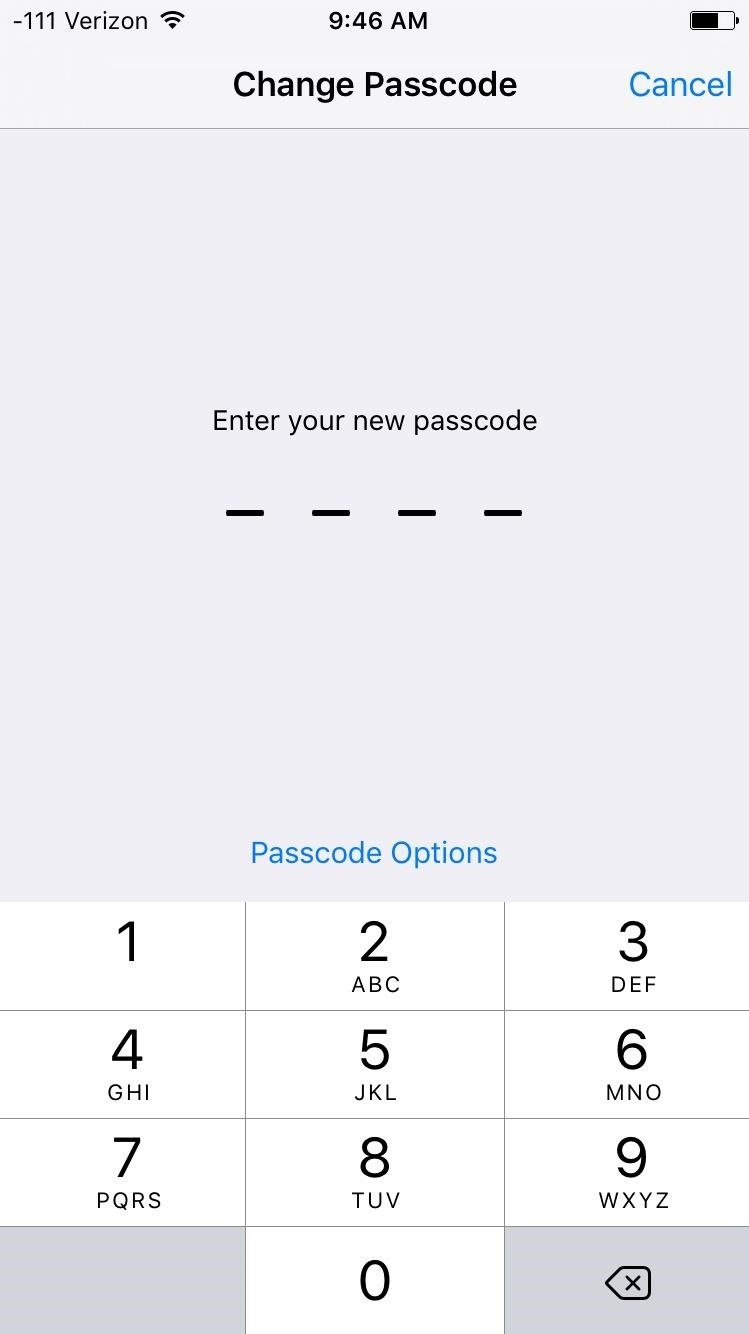
One thing you can do is use a simpler passcode. If you're using an alphanumeric or six-digit passcode, revert back to an easy-to-remember four-digit passcode. You can also disable passcode security, but we highly advise against doing so.
Head into Settings -> Touch ID & Passcode -> Change Passcode. After entering the existing passcode, tap Passcode Options, 4-Digit Numeric Code, then create a new one.
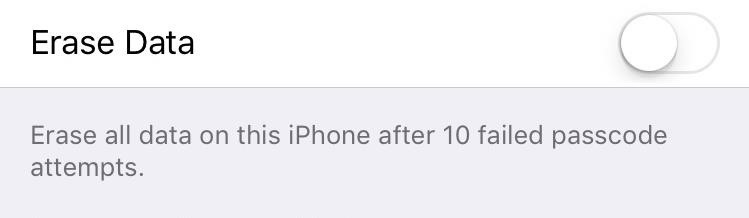
Another useful tip is disabling Erase Data from within the Touch ID & Passcode preferences. Toggling this off (if enabled) will prevent the device from wiping itself after ten failed passcode attempts, granting you more opportunities to remember the passcode you set.
It's also smart to save your passcode somewhere if you're someone who easily forgets things. Instead of using a Post-it note, try out a secure service like LastPass, which is easily accessible on your iOS device.
For those who have a jailbroken iOS device, you have a few more options available to you. The following guides will help get you started:
- Unlock Your iPhone Using the Current Battery Percentage
- Use an Easy-to-Remember iOS Passcode That Changes Every Minute
- Disable Security Lockouts from Too Many Failed Passcode Attempts
Other tweaks do exist, it's just a matter of exploring the Cydia repository and the jailbreak community.
Keep up with Apple Hacks over on Facebook and Twitter, or Gadget Hacks over on Facebook, Google+, and Twitter, for more Apple fun.
Just updated your iPhone? You'll find new emoji, enhanced security, podcast transcripts, Apple Cash virtual numbers, and other useful features. There are even new additions hidden within Safari. Find out what's new and changed on your iPhone with the iOS 17.4 update.


Be the First to Comment
Share Your Thoughts