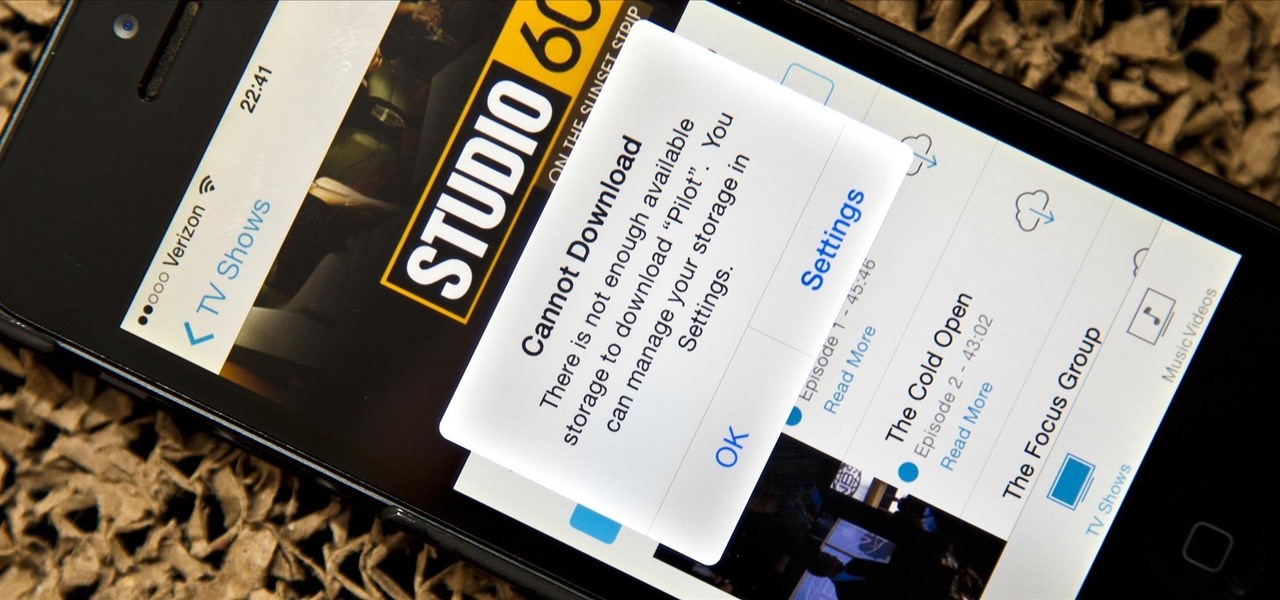

Running out of storage space on your iPhone is annoying, but trying to free some up is downright aggravating. Until they figure out a way to throw a terabyte of flash memory in there, you're going to have to do some spring cleaning every now and then, especially if you're trying to update to iOS 8.
The biggest storage hogs are usually photos and videos, but there's also the infamous other, which can claim up to 10 GB of space if you're not careful. Deleting a few pictures and movies might help you out of a jam, but if you're continually getting that "not enough available storage" warning, you've got to dig deeper.
How to Free Up Storage Space in iOS 7
This guide will show you how to free up space in iOS 7 so you never have to get a "memory full" message again. I'll be covering everything you need to know, from finding out what's taking up the most room to eradicating useless, invisible data.
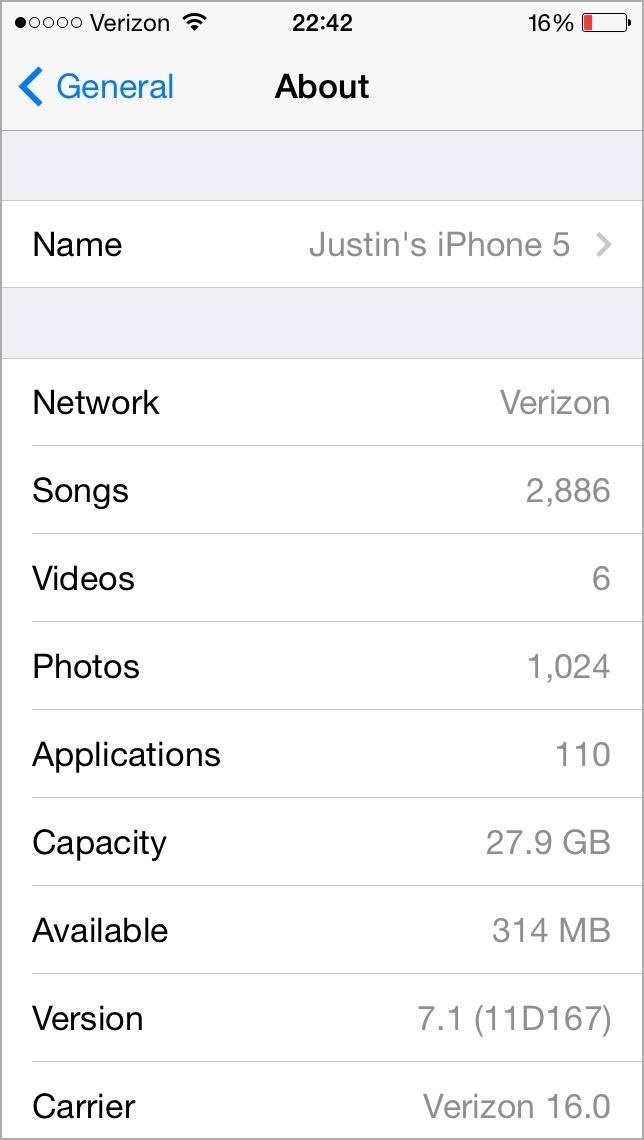
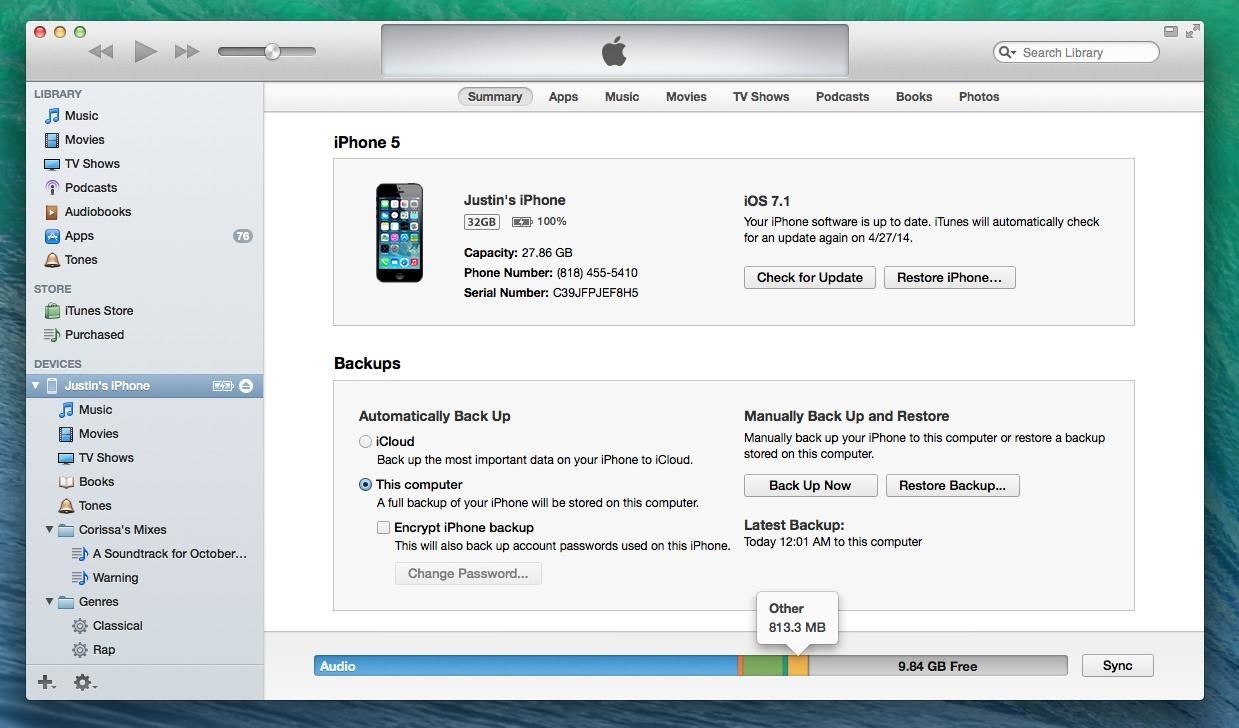
I'll be using my iPhone 5 (32 GB) with iOS 7.1 as an example, but most of these tips will work with older and newer iPhones, and can also be applied to any iPad or iPod touch. Before you begin, make sure to back up your device with either iCloud (wirelessly) or iTunes (cable).
I started with roughly 27.6 GB used and 314 MB available. Now, let's see how much room I can save without removing any of my music (the one thing I'm not willing to budge on).
NOTE: If you want to free up iCloud storage space, check out our other guide on managing your iCloud account for tips on that.
Step 1: Check Out Your Usage
Before you even begin deleting anything, let's see exactly how much space you've used up. Heading to Settings -> General -> About will show you how much space you have available, as well as give you an idea of how many songs, videos, photos, and apps you have. We want more information than that, though, so go to Settings -> General -> Usage instead and look at Storage.
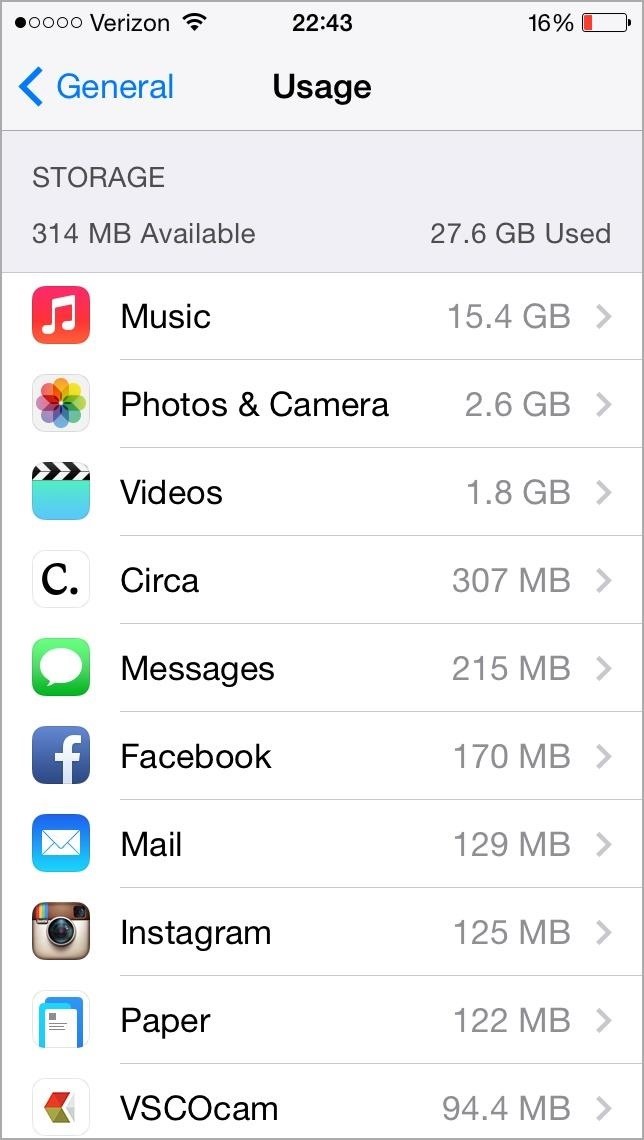
I'm not going to worry about music, because that's the one thing I'm absolutely sure I want to keep as is, but the rest is pretty much dispensable.
Step 2: Delete the Videos You've Watched
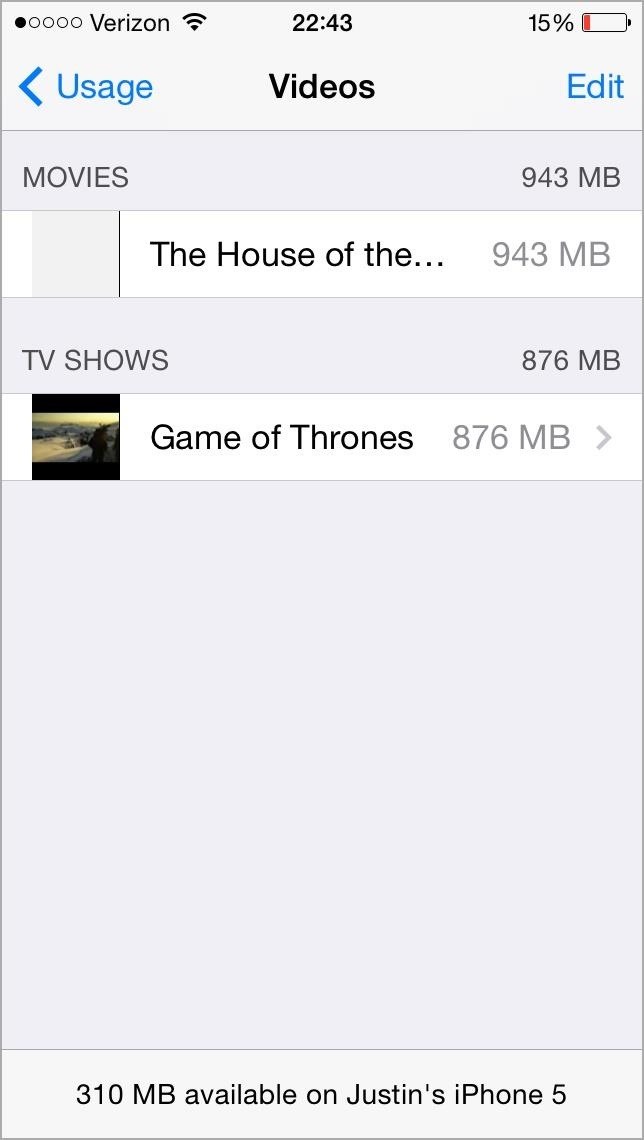
Now, you can't really do anything in the Usage menu besides delete whole apps, but one app does let you delete its contents separately, and that's Videos. Go ahead and tap on Videos, which will show you all of your TV series and movies from iTunes.
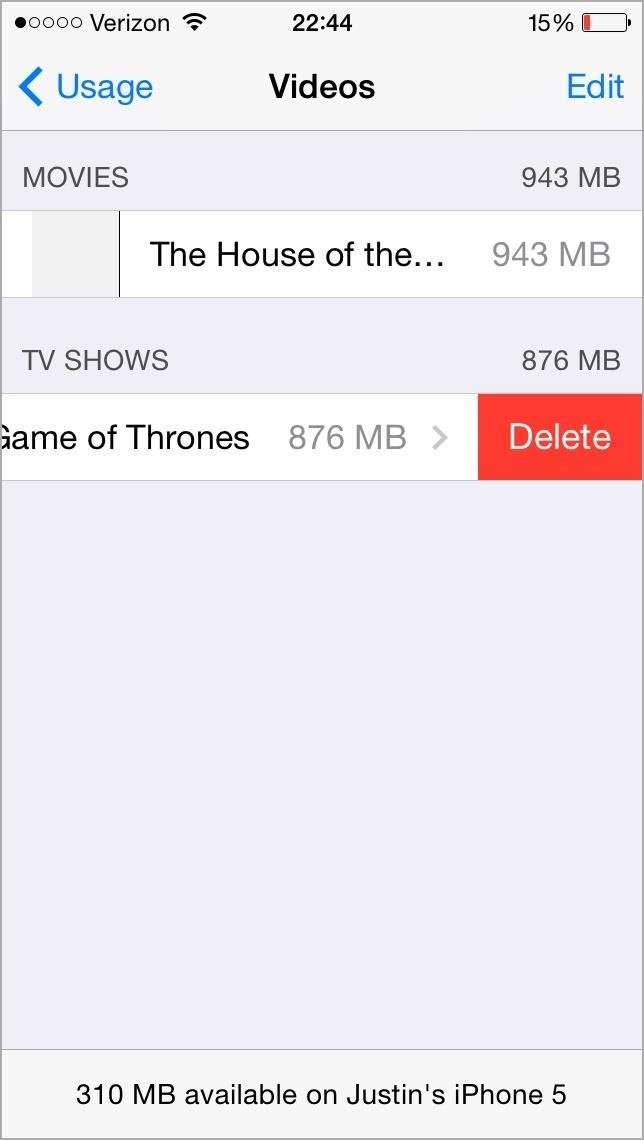
To remove a movie or entire series, just slide it to the left and hit Delete. Alternatively, you can hit Edit in the top right, tap on the minus symbols beside each one, and Delete (but that's slower).
If you just want to delete a few episodes of a TV series from your iPhone, just tap on it, then delete episodes individually instead.
And if they're purchased from the iTunes Store, you'll be able to re-download them again later, and if not, I'll assume you have them tucked away safely on your computer in iTunes.
Step 3: Save & Restore App Data (Optional)
If you've already backed up via iCloud or iTunes, most of the content on your device is ready to be restored if need be, including contacts, photos, Safari data, in-app purchases, and more.
They both will also back up app settings, preferences, data, and documents (but not temporary or cache), but you'll only be able to restore apps using a full backup, not individually. For that, there are apps like iExplorer and iFunBox.
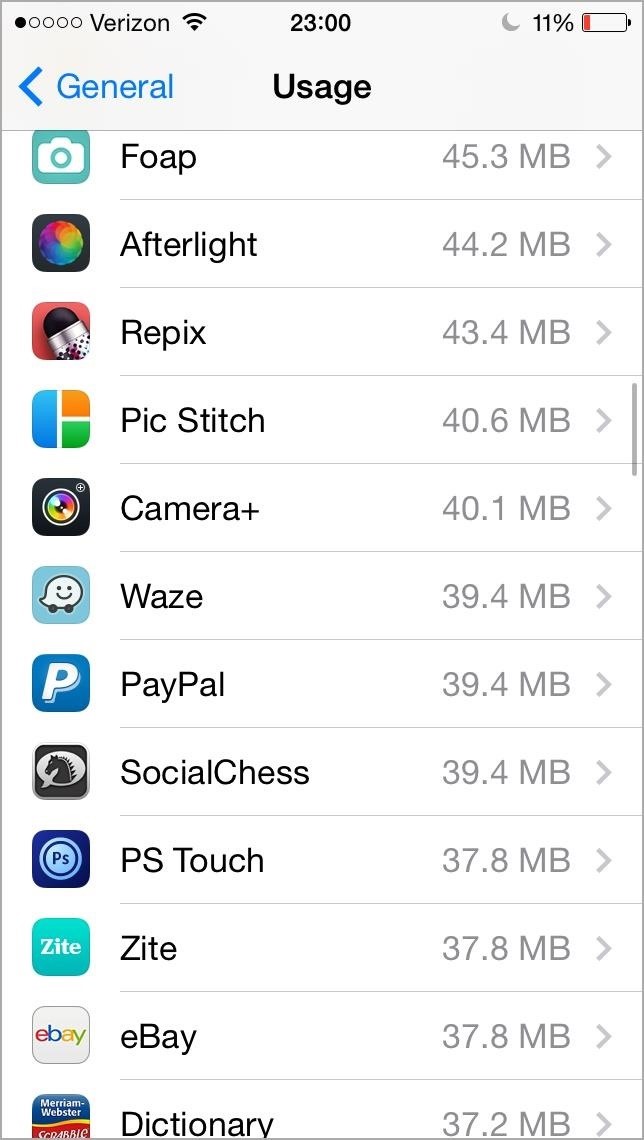
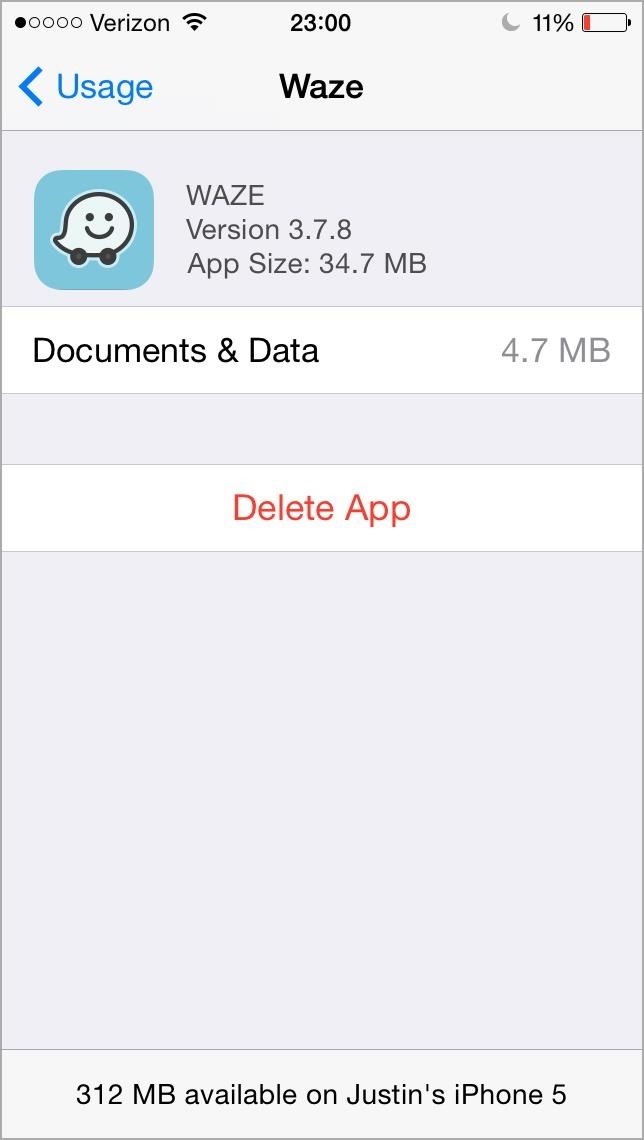
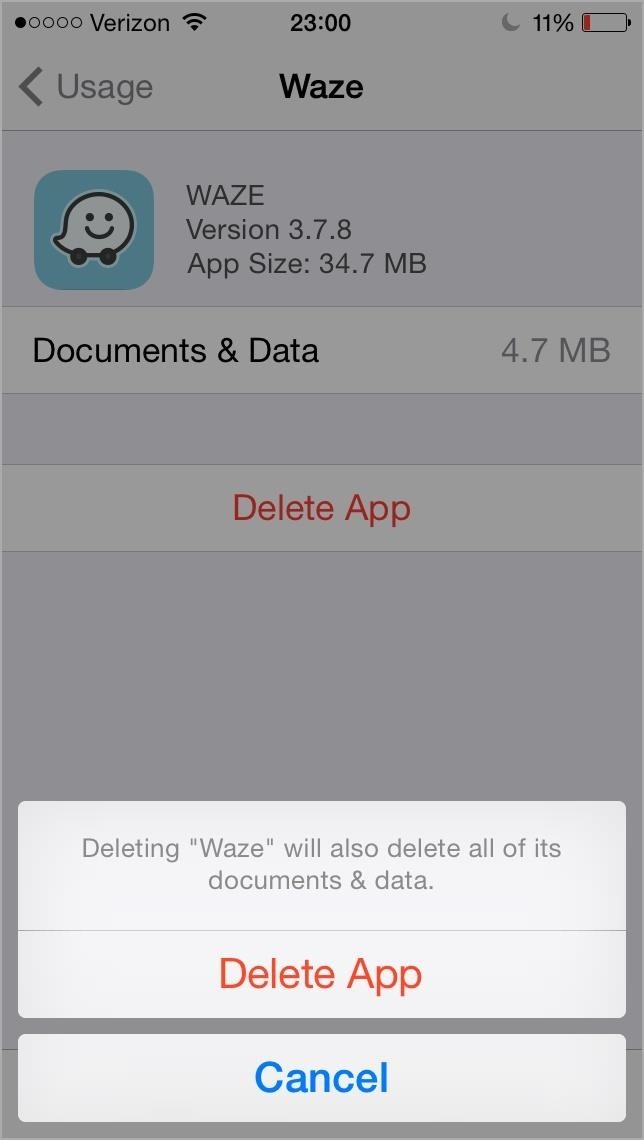
Step 4: Delete Space-Hogging Apps
Now that you've cleared out the biggest storage hogs and backed up any app data you want, go ahead and decide what apps you no longer want or need on your iPhone. Just tap them, hit Delete App and Delete App again to confirm. This will delete the app and all its documents and data, so make sure before you commit.
Alternatively, you can delete apps from your home screen by pressing and holding on them, hitting the red X sign, and confirming deletion.
Step 5: Save Photos from Messages
We're done with the Usage section, and now it's time to deal with photos, but before we get to deleting any, let's save all of the ones that are hidden in your text messages, either sent by you or received. If you don't care about keeping any of them, skip to the next step.
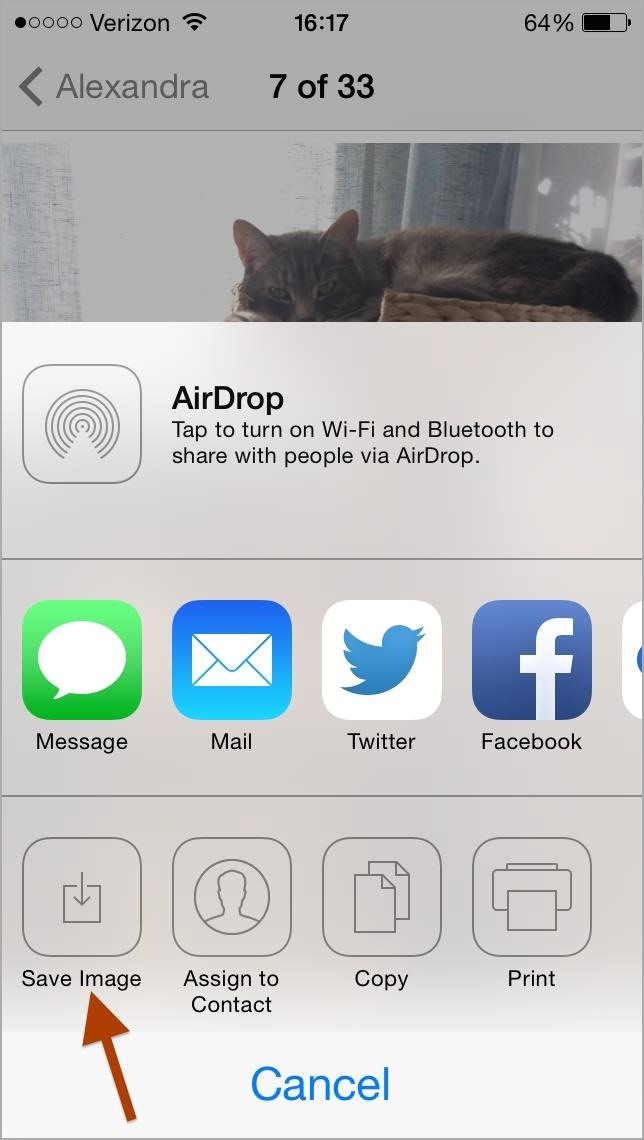
Method #1: Manually Find & Save Photo Messages
In order to save your photos manually to your Camera Roll, you'll need to Load Earlier Messages in each conversation until you reach the beginning so all the images load. Select one and save it to your Camera Roll, then slide to the next image and continue doing it for each one. Do this for each conversation.


Method #2: Automatically Find & Save Photo Messages
If you don't want to do it manually, you can it using an open-source Perl script on your computer, but you will need to already have a backup of your iPhone created with iTunes.
It's a somewhat lengthy process, involving Terminal, but depending on how many photos you think are hanging around in your Messages app, it might be way quicker. Plus, it saves a copy of your text messages.

Check out Nelson's guide on extracting and backing up text and picture messages on an iPhone for instructions.
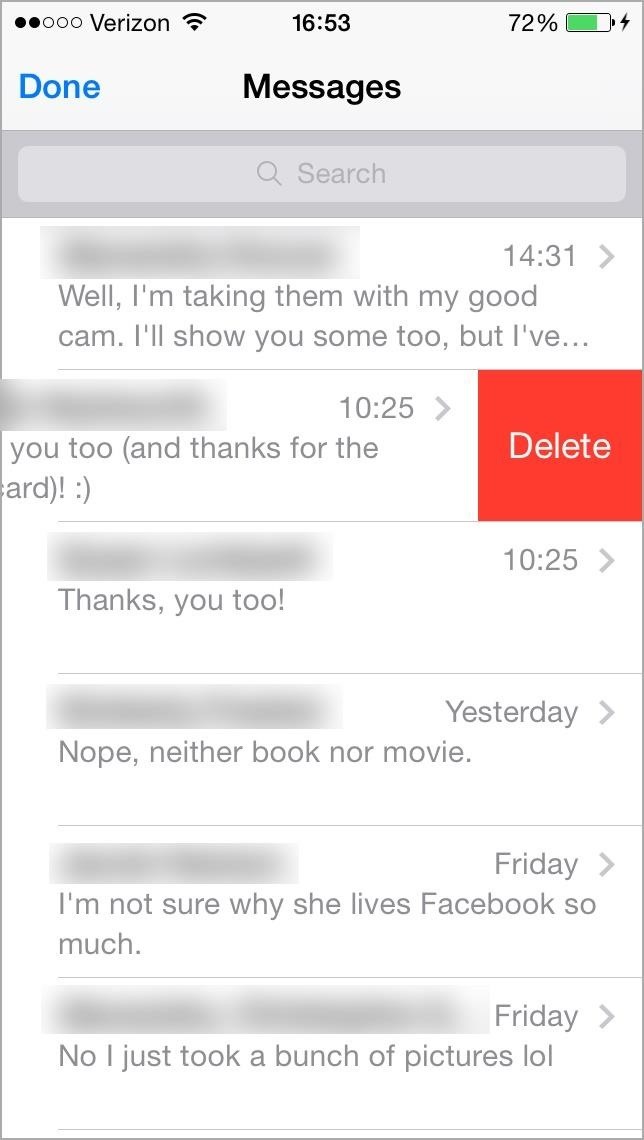
Step 6: Delete All Messages
Now that your photo messages are safely backed up, you should delete all of your SMS, MMS, and iMessages. If you backed up with iCloud or iTunes, you can retrieve your text messages by restoring your device, or can use the Perl script method above to extract and view them on your computer.
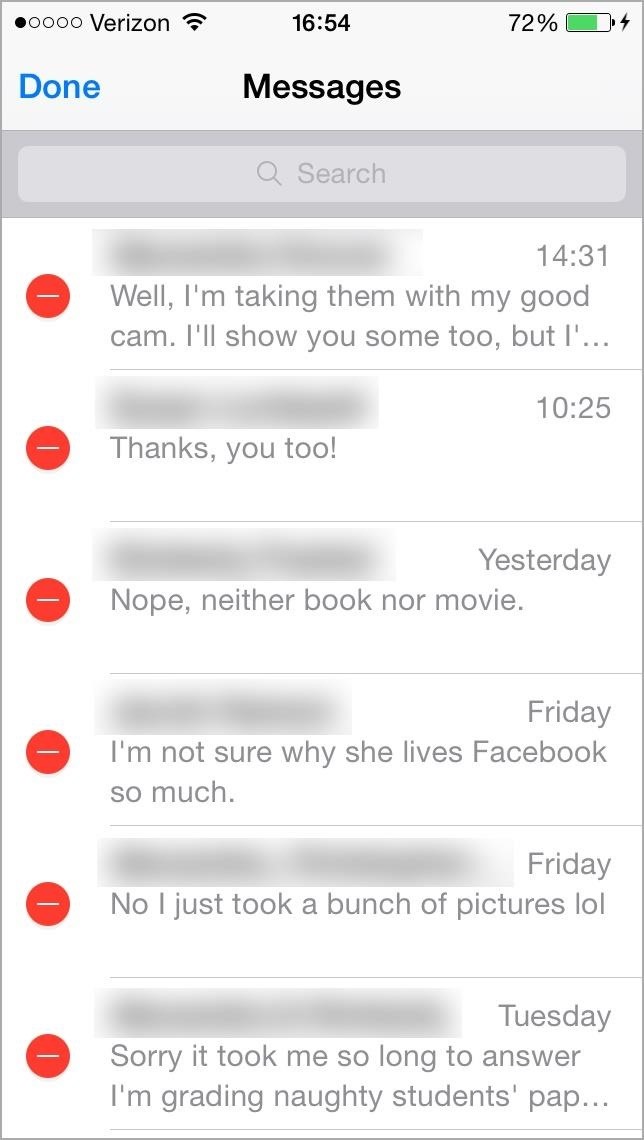
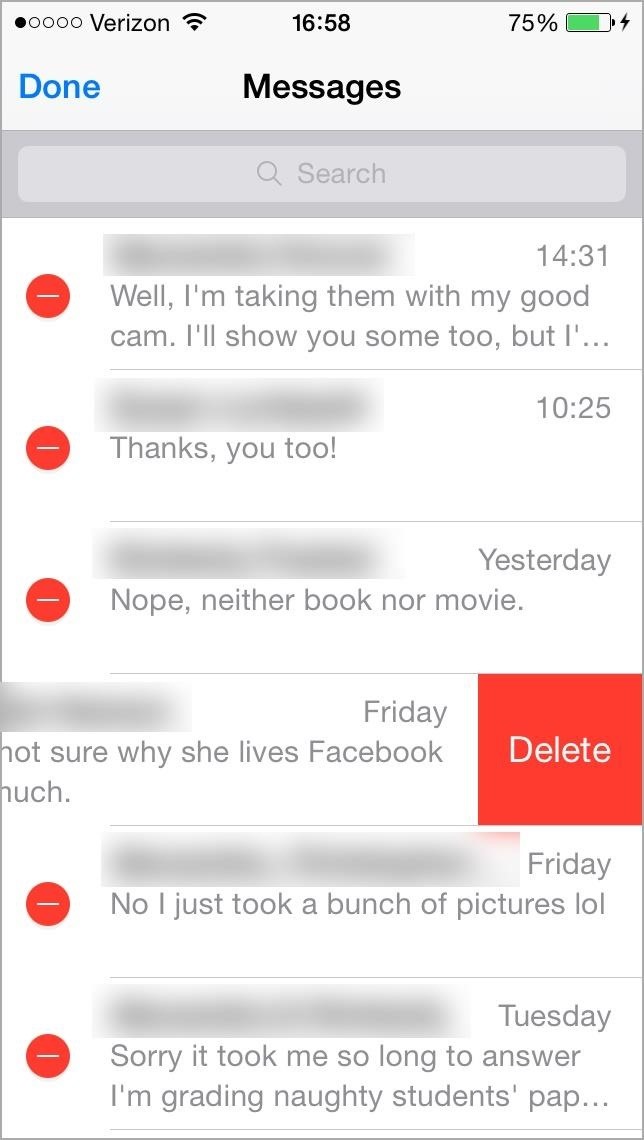
I like saving photo messages, but the texts and iMessages I don't see the need to hang on to. You'll have to delete them conversation by conversation in Messages by swiping each one left and tapping Delete. Alternatively, you can tap Edit in the top left, tap the red minus circle next to each thread, and confirm with Delete.
Step 7: Back Up & Delete Camera Roll
If you don't care about your images, go ahead and just delete them. Otherwise, make sure to you back them up. You can sync to iCloud or iTunes, upload to Dropbox or another third-party cloud storage, or you can download your images to a computer (my preferred method).
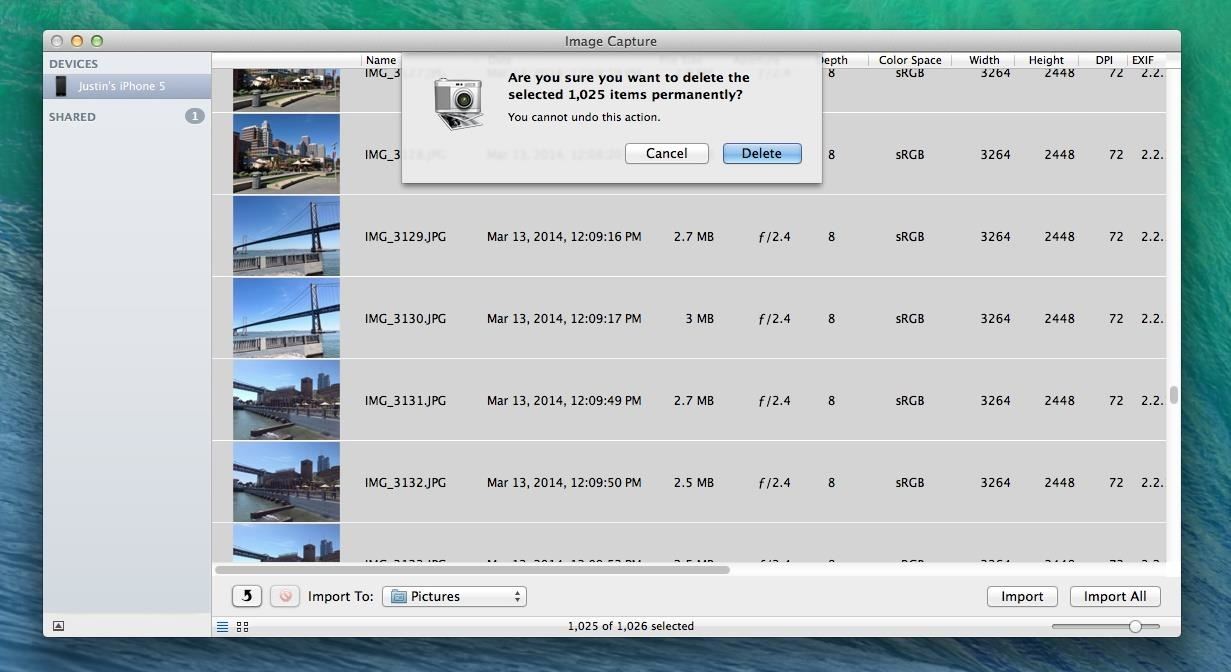
I sync my iPhone with iTunes, but I do not sync my photos that way. I like total control over where my pics go, so I use Image Capture to transfer them to a new folder (until I get time to deal with them), then delete them all straight from Image Capture. All newer Macs should have the Image Capture application already installed on them.
If you used the manual method for saving photo messages in Step 4, they will be included in this group of pictures, since they're all in your Camera Roll.
If for some reason you deleted them prematurely, check out our guide for recovering delete photos on your iPhone. It may not be possible, but it's worth a shot if you really need them.
Step 8: Delete Photo Stream
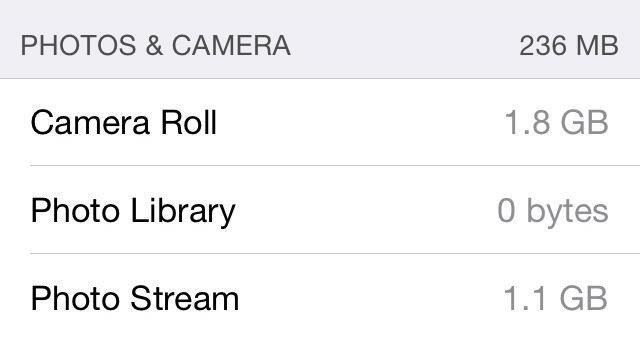
If you have Photo Stream enabled on your iPhone, which could definitely be the case as it's on by default, you might have about 1 GB of space being eaten up on your device.
Photo Stream keeps up to 1,000 of the latest photos you take and stores them across your devices, and if you only have Photo Stream enabled on your iPhone, you're pretty much just duplicating your last 1,000 photos in your Camera Roll. You can check out the Photos & Camera app in the Usage section to see just how much space it's eating up.
If you use Photo Stream as a means of backing up your iPhone photos to iPhoto or Aperture on your Mac, then make sure you save those images locally on your computer every now and then so you can delete them from the Photo Stream and save storage space on your iPhone.
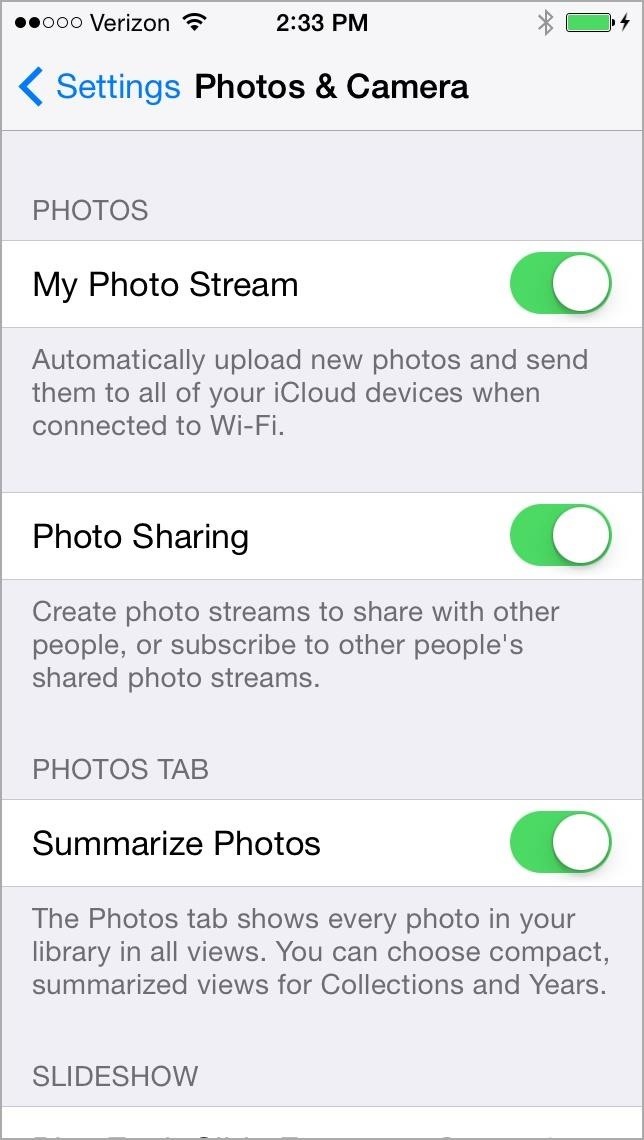
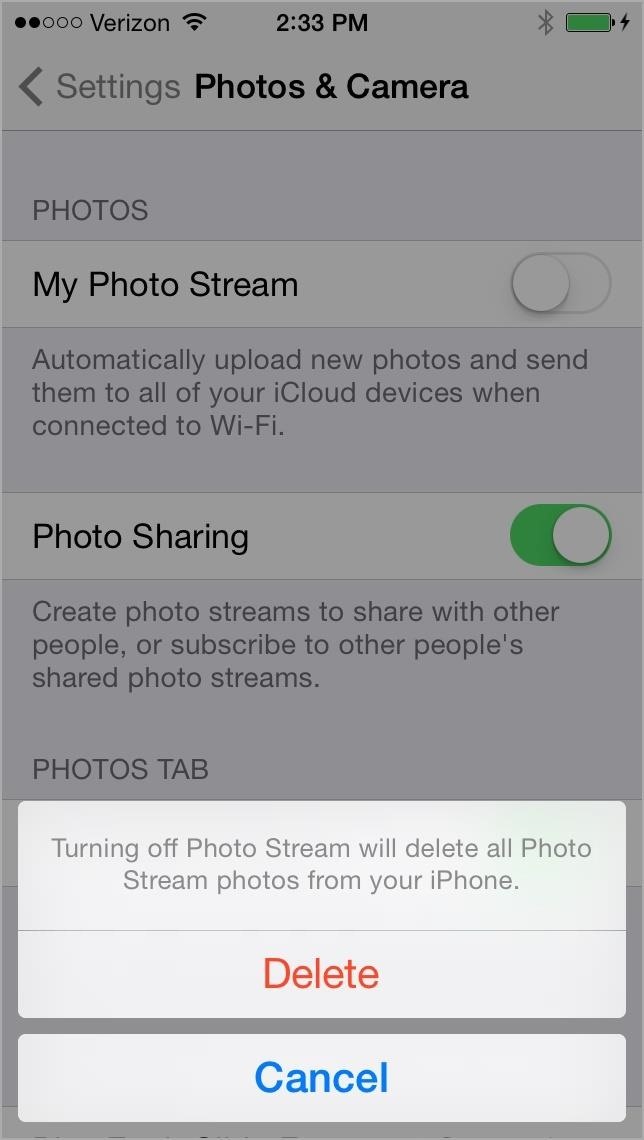
Or, if you don't care about sharing your photos to other devices and prefer backing up with Image Capture or something else, turn this feature off entirely by going to Settings -> Photos & Camera -> My Photo Stream -> Delete.
Being Smarter About Your iPhone Photos
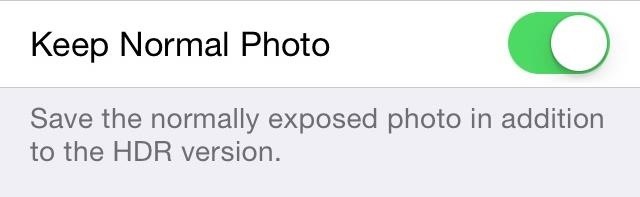
If you're like me and tend to shoot in HDR mode while keeping the normal photo, you'll have a lot of duplicate images. I shoot my pics this way because sometimes the HDR looks better, sometimes the normal one looks better. I usually choose right away which one I want to keep, then delete the other, but if you always want the HDR version, turn of Keep Normal Photo in your Photos & Camera settings.
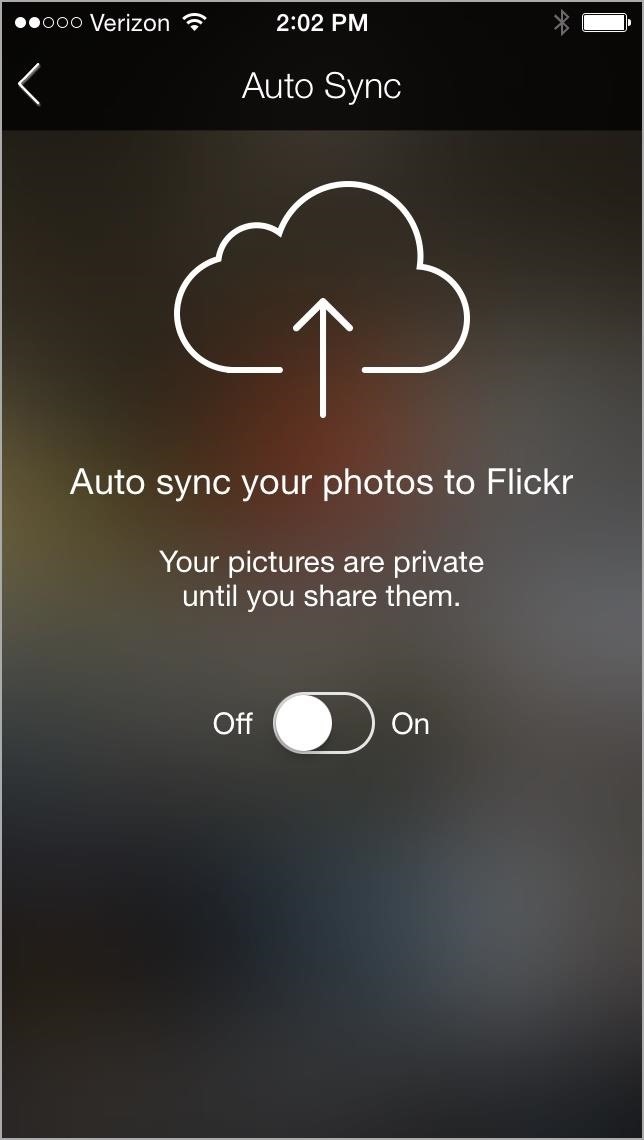
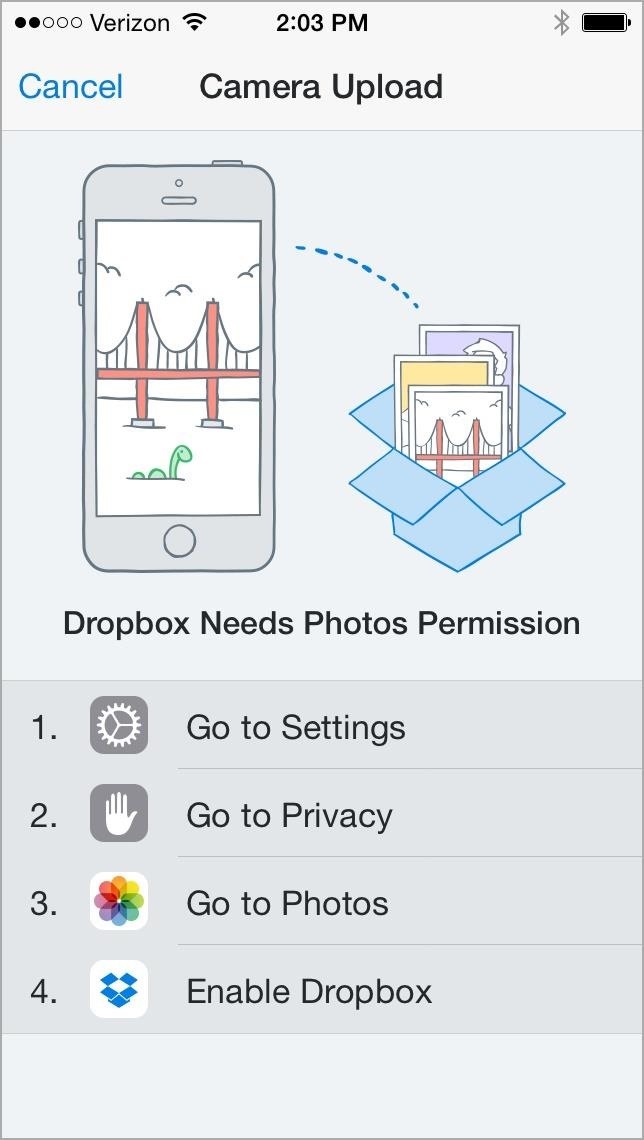
Also, consider backing up your Camera Roll automatically so you don't have to deal with Photo Stream or syncing manually with iTunes or using Image Capture.
There are a LOT of third-party options for you to choose from. You can set up iCloud, Dropbox, Flickr, Facebook, Google+, OneDrive, and other cloud storage accounts to back up your Camera Roll automatically. You'll still have to delete the images on your iPhone after they back up, but it's relatively easy process at that point.

Step 9: Delete the "Other" Stuff Taking Up Room
If you've ever connected your iPhone to iTunes, you're well aware of the "other" stuff taking up space on your device. This data contains things like Safari's browser cache, your email, Siri's cache, reminders, notes, stocks, weather data, emails (including attachments), text messages, iMessages (including images and videos), app data, etc.
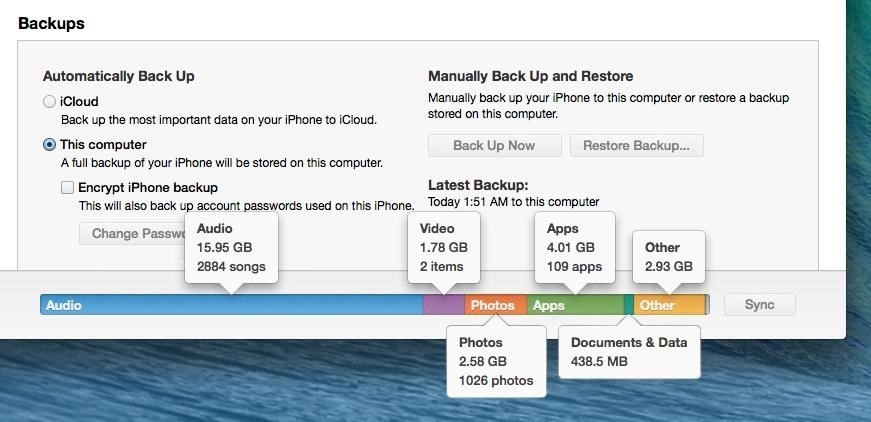
As you can see above, I have almost 3 GBs of Other space, and about 0.5 GBs of Documents & Data (which includes certain app data like iWork docs and email attachments). Let's try and clean some of this up.
Other #1. Delete CrashReporter Logs
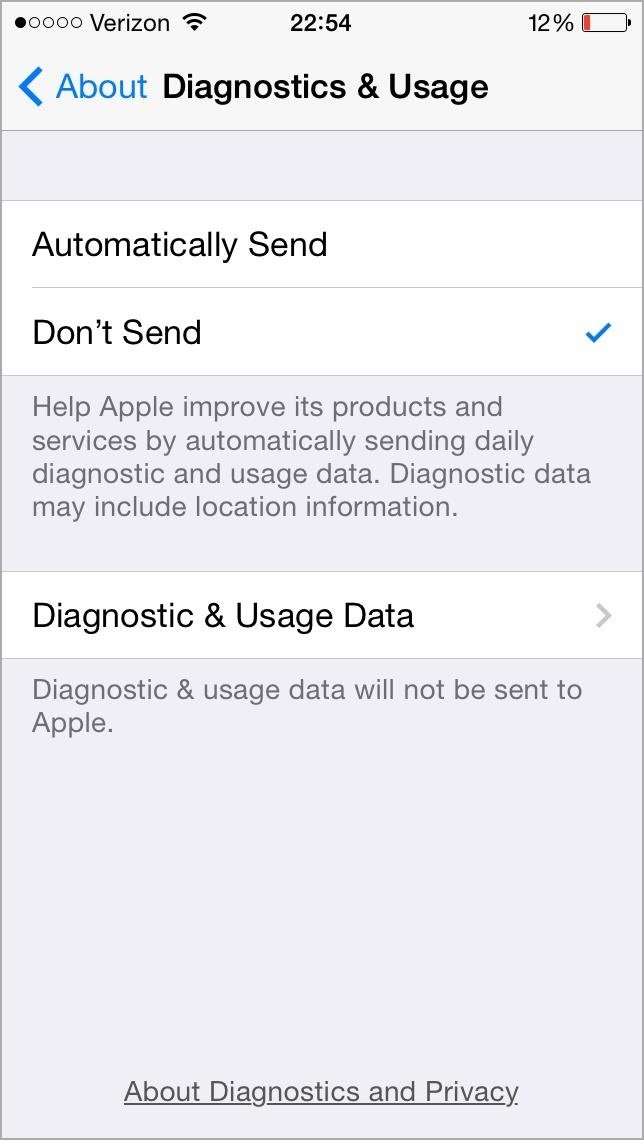
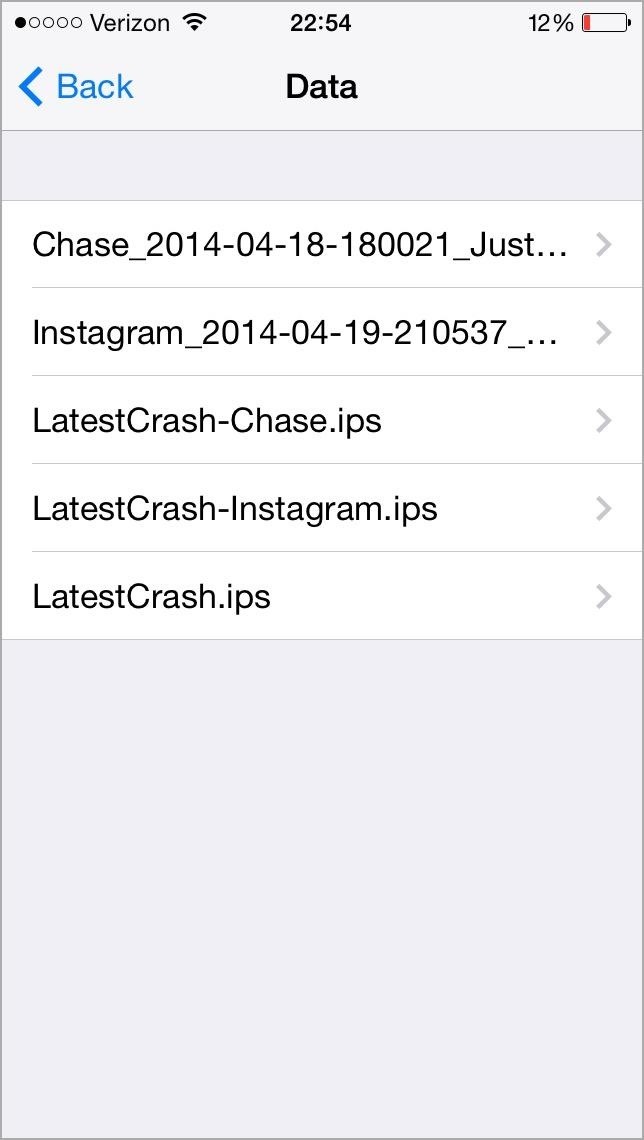
I discovered this little known trick the last time I got a baseband dump error message. Apparently, there is no way to delete crash logs on your iPhone if you only sync via iCloud. You can view them at Settings -> General -> About -> Diagnostics & Usage -> Diagnostic & Usage Data, but that's it.
In order to get rid of them, you have to physically connect your iPhone to iTunes on your computer and sync it. Afterward, your CrashReporter logs will be transferred over to your computer and deleted from your iPhone.
Depending on how long it's been since you've last synced, it could be a fairly small amount of data, or could be the biggest culprit in your "other" space. If you connected to back up earlier, you should already have a clean slate.
Once transferred, you can find the crash reports on your computer at User -> Library -> Logs -> CrashReporter -> Mobile Device - Your iPhone, and they can also be viewed in your Console.
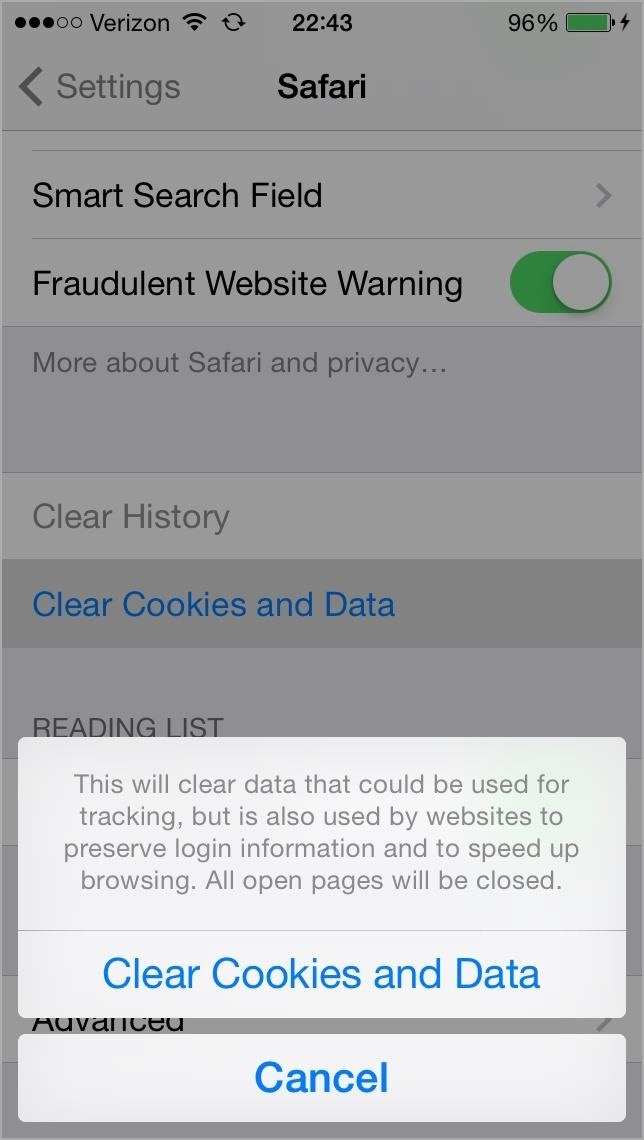
Other #2. Delete Safari History & Cache
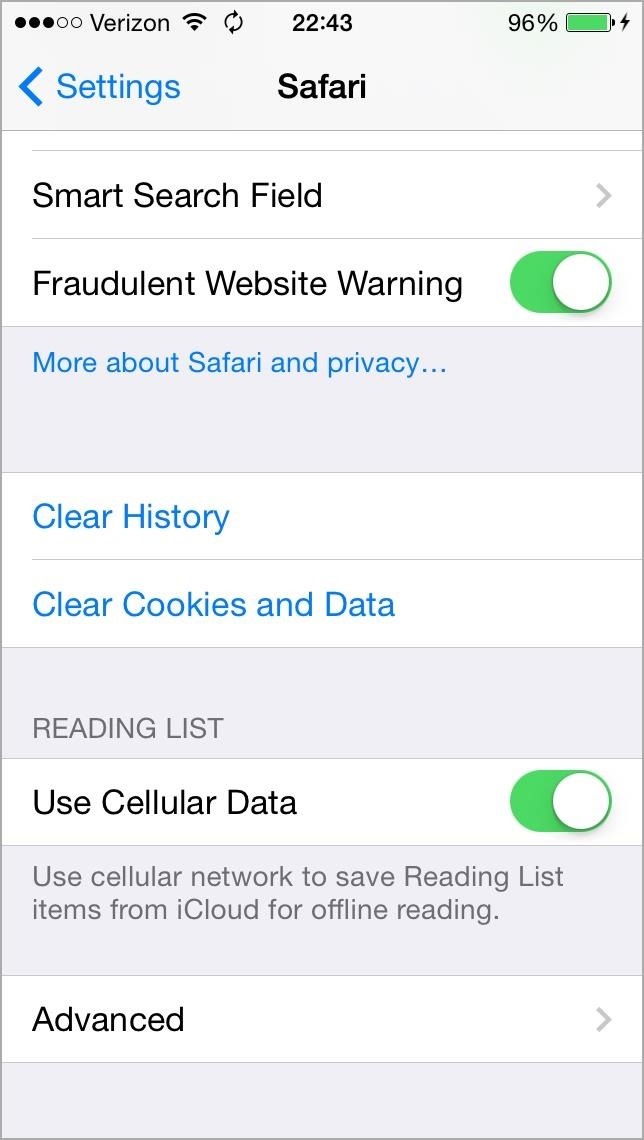
Though fairly small, the history and cache in Safari contributes to the consumption of storage space. Go to Settings -> Safari and Clear History and Clear Cookies and Data. Confirm at the prompts.
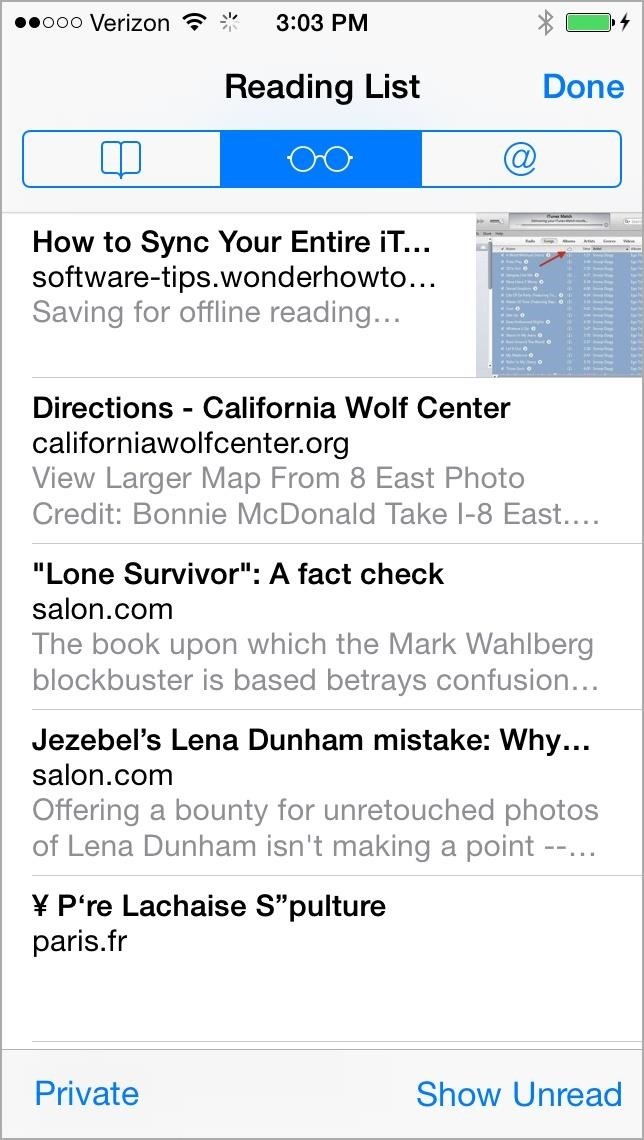
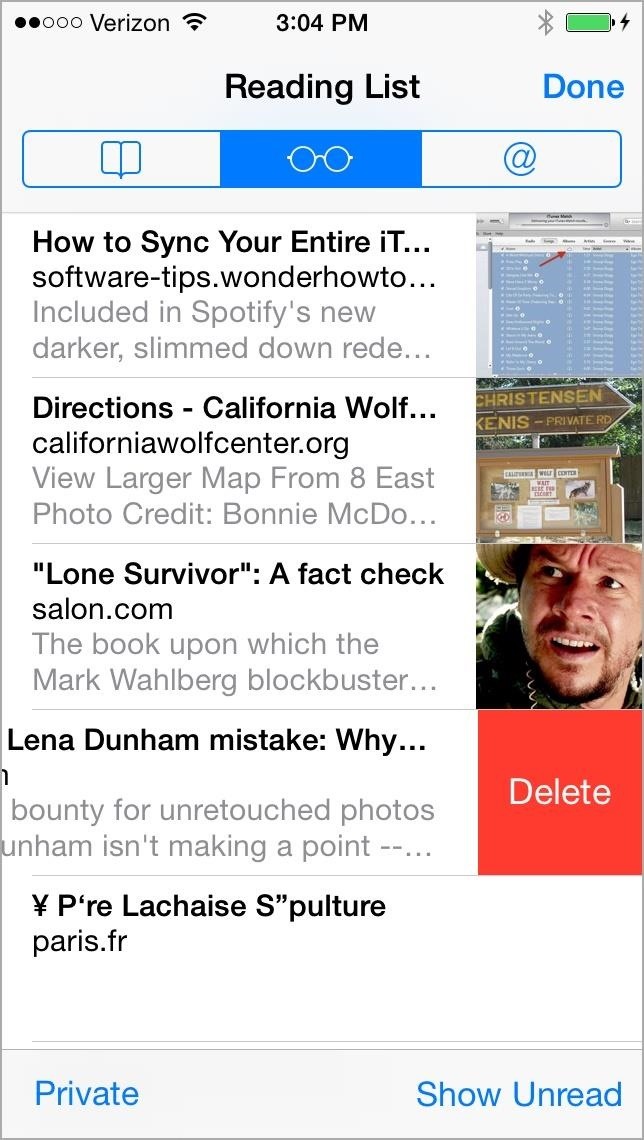
Also, you'll want to actually open up the Safari app and hit the Bookmark icon at the bottom, then navigate to your Reading List and Delete them one by one. I usually add things here by mistake, and chances are you do to.
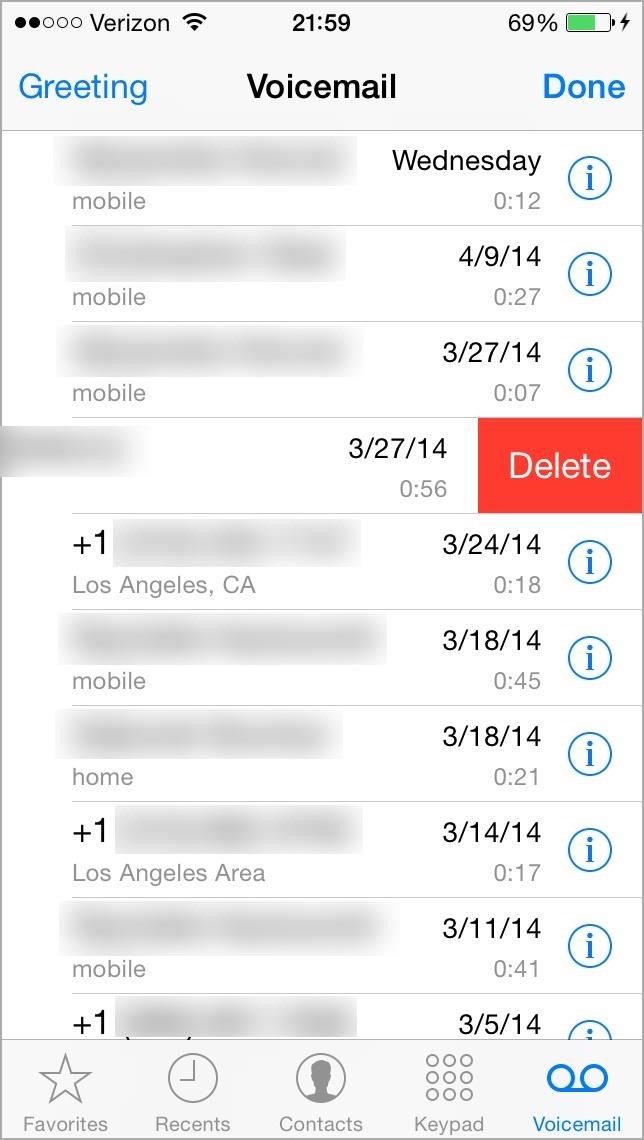
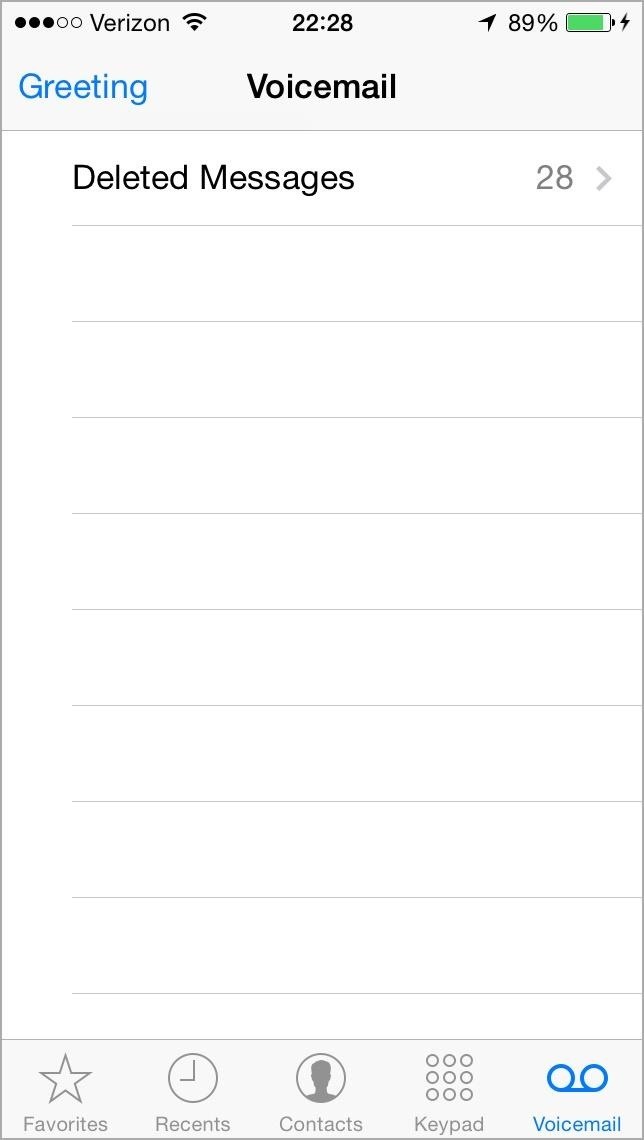
Other #3. Delete Voicemails
Yep, these take up space too. You can back up voicemails using iExplorer, but if you don't care about saving the actual voice messages and only the important details, just jot down a few notes and email them to yourself. Then delete them one by one by going to Phone -> Voicemail and sliding them left to Delete (or use the Edit option of top). Once that's done, tap on Deleted Messages and delete them forever.

Other #4. Delete Everything Else
There are lots of other little things you can clean up too, including Keyboard Shortcuts, Keyboard Dictionaries, and even more monotonous features. But, the ones I find that take up the most space are Books, Emails, third-party Photo Apps, and Cloud Storage apps.
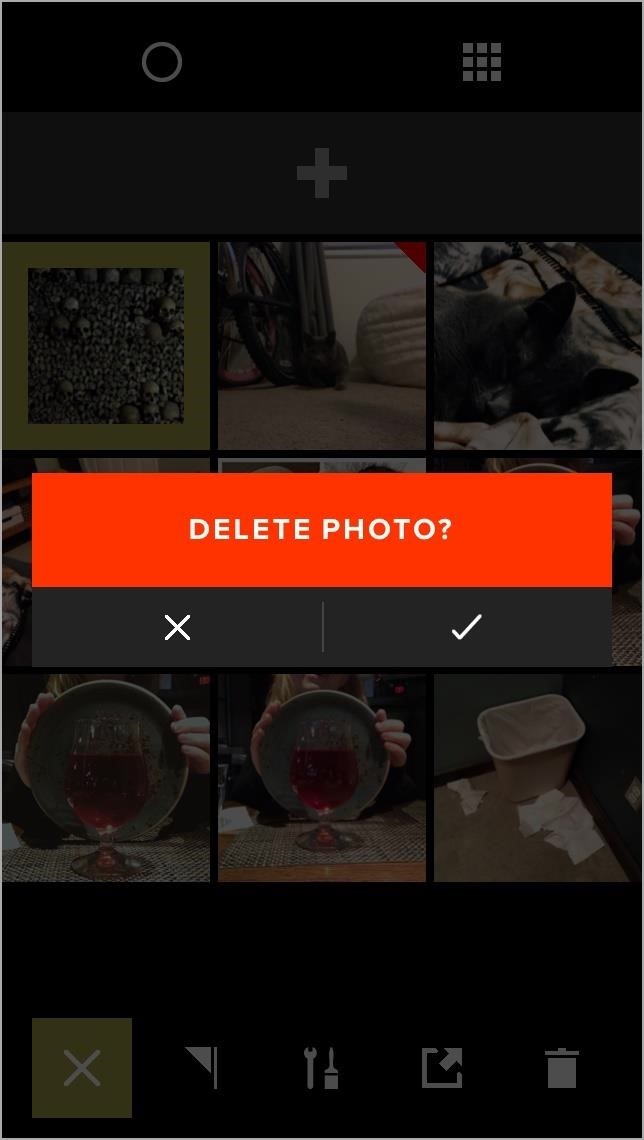
Yes, you heard that right. Some of the photo apps you have might actually save their photos in their own documents folder, VSCO Cam being one of them (at least on my device). Back up and delete all those you can find.
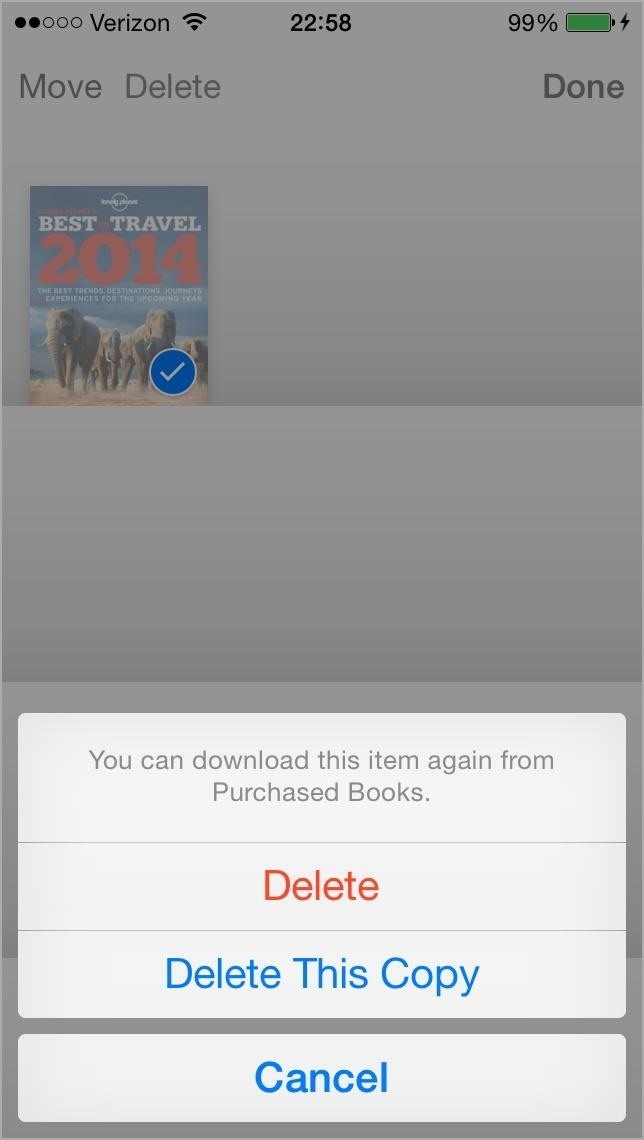
Also, even though I no longer had iBooks on my iPhone, there was still a book stored on my iPhone. Even if I turned off syncing of Books in iTunes, it would still remain. In order to delete this data, you have to install iBooks again on your iPhone, delete the books from within the app, then uninstall iBooks.
As far as emails go, there's a lot of attachments that are eating up your data, and the best way to delete it is to just delete each email account and re-add them. For the most part, I didn't save much space deleting my multiple Gmail accounts, Yahoo, and others. My other still resided at 2.86 GBs at this point, and my Documents & Data was still 300+ MBs.
My iCloud email is where it's all at, and deleting that is a pain, so I opted for the next step. If you've saved enough space by now, you won't have to go this far, but it was best for me to go all the way.
Step 10: Wipe Your Device & Start Over (Last Resort)
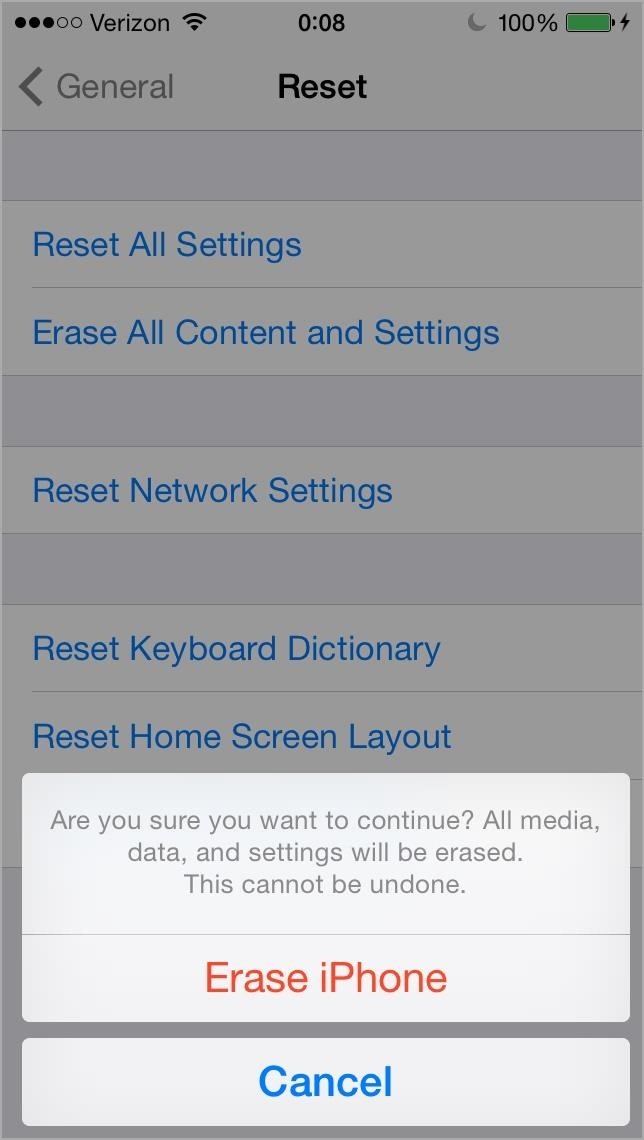
The best way to reclaim space is to back up your iPhone with iTunes, then wipe your device and restore from a backup. I actually opted to set mine up as a new iPhone to maximize my new space (sorry, Candy Crush, you had to go). Either way, to start fresh, go to Settings -> General -> Reset and Erase All Contents and Settings.
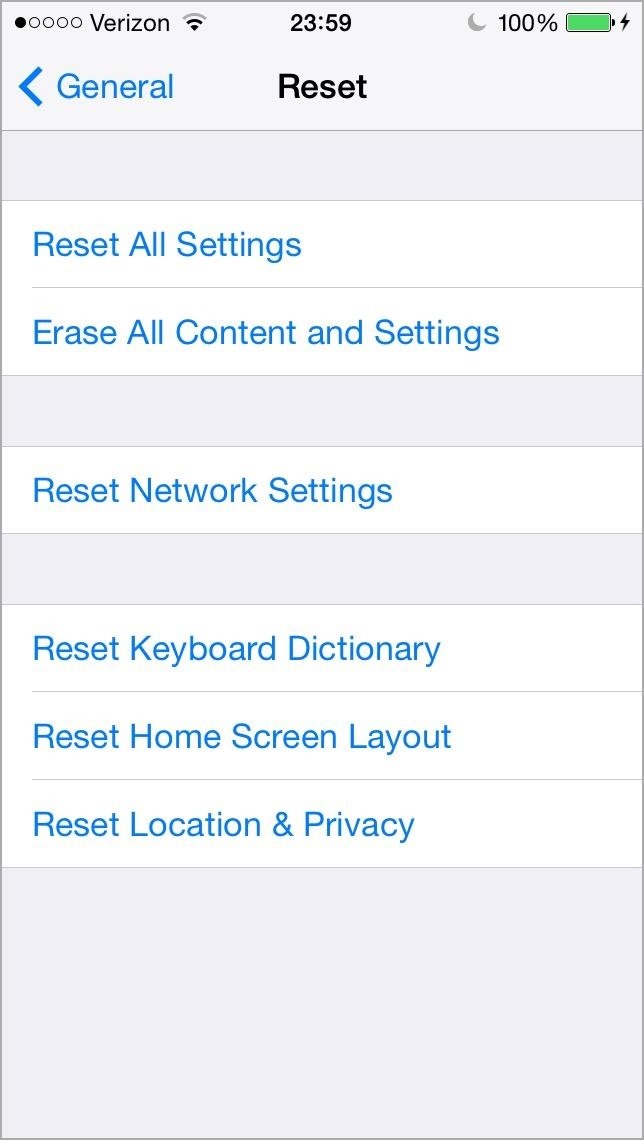
I tried just resetting the keyboard and settings, but it didn't affect that remaining 2+ GBs of other space, so I just went all the way. Afterward, I still had 800+ MBs of space, but my documents went down to about 30 MBs.
If you want to restore your iPhone, you can do so in iTunes, but I opted to start fresh, and I went from about 5 GBs of available space after doing all the little tricks above, to 10 GBs after erasing and restoring. Not bad at all.
Just updated your iPhone? You'll find new emoji, enhanced security, podcast transcripts, Apple Cash virtual numbers, and other useful features. There are even new additions hidden within Safari. Find out what's new and changed on your iPhone with the iOS 17.4 update.


16 Comments
This is, by far, the best article and advice I have ever gotten for saving storage space on my iPhone. No other source - forums, Apple retail store, Apple forums, other tech sites - does it as thoroughly, meticulously and perfectly as this.
Fantastic stuff!
Awesome article!
Great help..
Thanks
What about music?
That's my biggest space hogger
Nice article. Unlike many unwanted and wasteful blogs out there.
Thanks.
I was showing 8.1G of space in Messages. I have deleted at least 25 txt strings, and have only saved 2 which are small. One of those has about 5 photos....shouldn't amount to much. Now I'm showing 7.7G. What is taking up all of this space?!
I have checked all other apps and are all less than 1G and most less than 1MB. I have deleted many apps.
To save space on your phone pay $25 bucks a year and store all your music in iTunes Match, it saved my 16 Gigs!, the only thing or caveat is if you are underground or don't have service you cant access it. However, you can store it all in the cloud and download what you listen to most often to your phone.
this is amazing very useful, however need more help with the 'other' in particular
Other #1. Delete CrashReporter Logs
i have like 2.5GB being taken up and i cant get rid of it??? nor can i find it once pluged into the PC??? help
I have done all of those things but it says I need .4 MB to download iOS 8
Ahhh so close...
The amount of space you need to clear is less than a photo's worth. Maybe just delete one more picture...
I have a 4s and only 8G.....i deleted all my apps and still didnt have enough to DL IOS 8.....it said i had available only 3.9G, I went on itunes to mess around there and it asked me if I wanted to update to IOS 8 and it let me..on my phone I couldnt cuz it said i need at least 4.6 G
To all of you having problem getting enough space to upgrade to iOS 8.
Try the app Optimal Image and follow these simple steps.
This will definitely save space AND you will still have all your photos and videos in your phone.
Thank you, thank you, thank you!
Where do you go view and delete the CrashReporter Logs if you are using a PC?
Is this guide outdated with iOS8? I just did step 10, but restored all content from back up with iTunes an I still have over 1GB of "Other".
What do you mean by "start fresh"?
Putting all your settings, apps and content back to iPhone manually? How many hours that would take including the time to write everything down before wipe-out? (This is actually the sole reason I chose iPhone in the first place: you can back-up and restore EVERYTHING. It used to be PITA with Nokia...)
EDIT: Seems to be that syncing was still underway. Now my "Other" is only 170MB! Great, reset & restore still works!
Yeah, there are some new tricks in iOS 8, and I'll probably be making an updated guide soon. In the meantime, you can try doing things like using iCloud Photo Library to store original-res photos online.
And yes, when I said "start fresh," I meant it. Contacts and such will still be there after signing back into iCloud, and some app data will still be available if you're using iCloud Drive, but deleting everything is the best way to clear up space.
Not only because it gets rid of a lot of the other space, but because it forces you to reinstall your apps manually, and you probably won't download all of them this time, just the ones you use. Just beware that you'll have to log back into any apps you install again.
Amazing. Just cleaned 2GB of logs (2yrs). Thank you!
Share Your Thoughts